> ## Documentation Index
> Fetch the complete documentation index at: https://docs-cerberus.c7-security.com/llms.txt
> Use this file to discover all available pages before exploring further.
# Using Auto-OSINT
> A guide to running OSINT reconnaissance against people with AutoPT's auto-osint mode
AutoPT has a special mode dedicated to open-source intelligence gathering. We call it **Auto-OSINT**. Instead of actively probing your assets, this mode focuses on collecting information that is already publicly available.
For now, auto-osint works against **people** - it builds a footprint of a target individual from public sources: social media, messenger accounts, breach and leak appearances, and any other digital traces that can be found and verified. Support for other asset types will come later.
This guide walks you through getting auto-osint running.
## Before you start: check namespace support
Auto-osint is not enabled on every namespace by default. It relies on a set of data sources and connectors that have to be provisioned for your instance first.
Before you set anything up, contact your Cerberus instance manager and ask whether auto-osint is supported on your namespace. If it isn't, they'll enable it for you. There's no point preparing a run until this is confirmed - the mode simply won't be available in the service selector otherwise.
Once your instance manager confirms it's active, you're ready to go.
## Two ways to run auto-osint
There are two ways to launch an auto-osint run:
* **Template mode** - pick one of the ready-made OSINT templates. Each template provides a structured form and a predefined scope of what to look for. This is the fastest way to get useful results and a good starting point if you're new to the mode.
* **Custom mode** - write your own instructions from scratch. You decide what to prioritize and how deep to go. Use this when a template doesn't quite fit what you're after.
You select between them in the IDE, the same place you'd normally write an AutoPT prompt.
## Running from a template
Templates are the quickest path. Open the IDE and click **New Execution**.
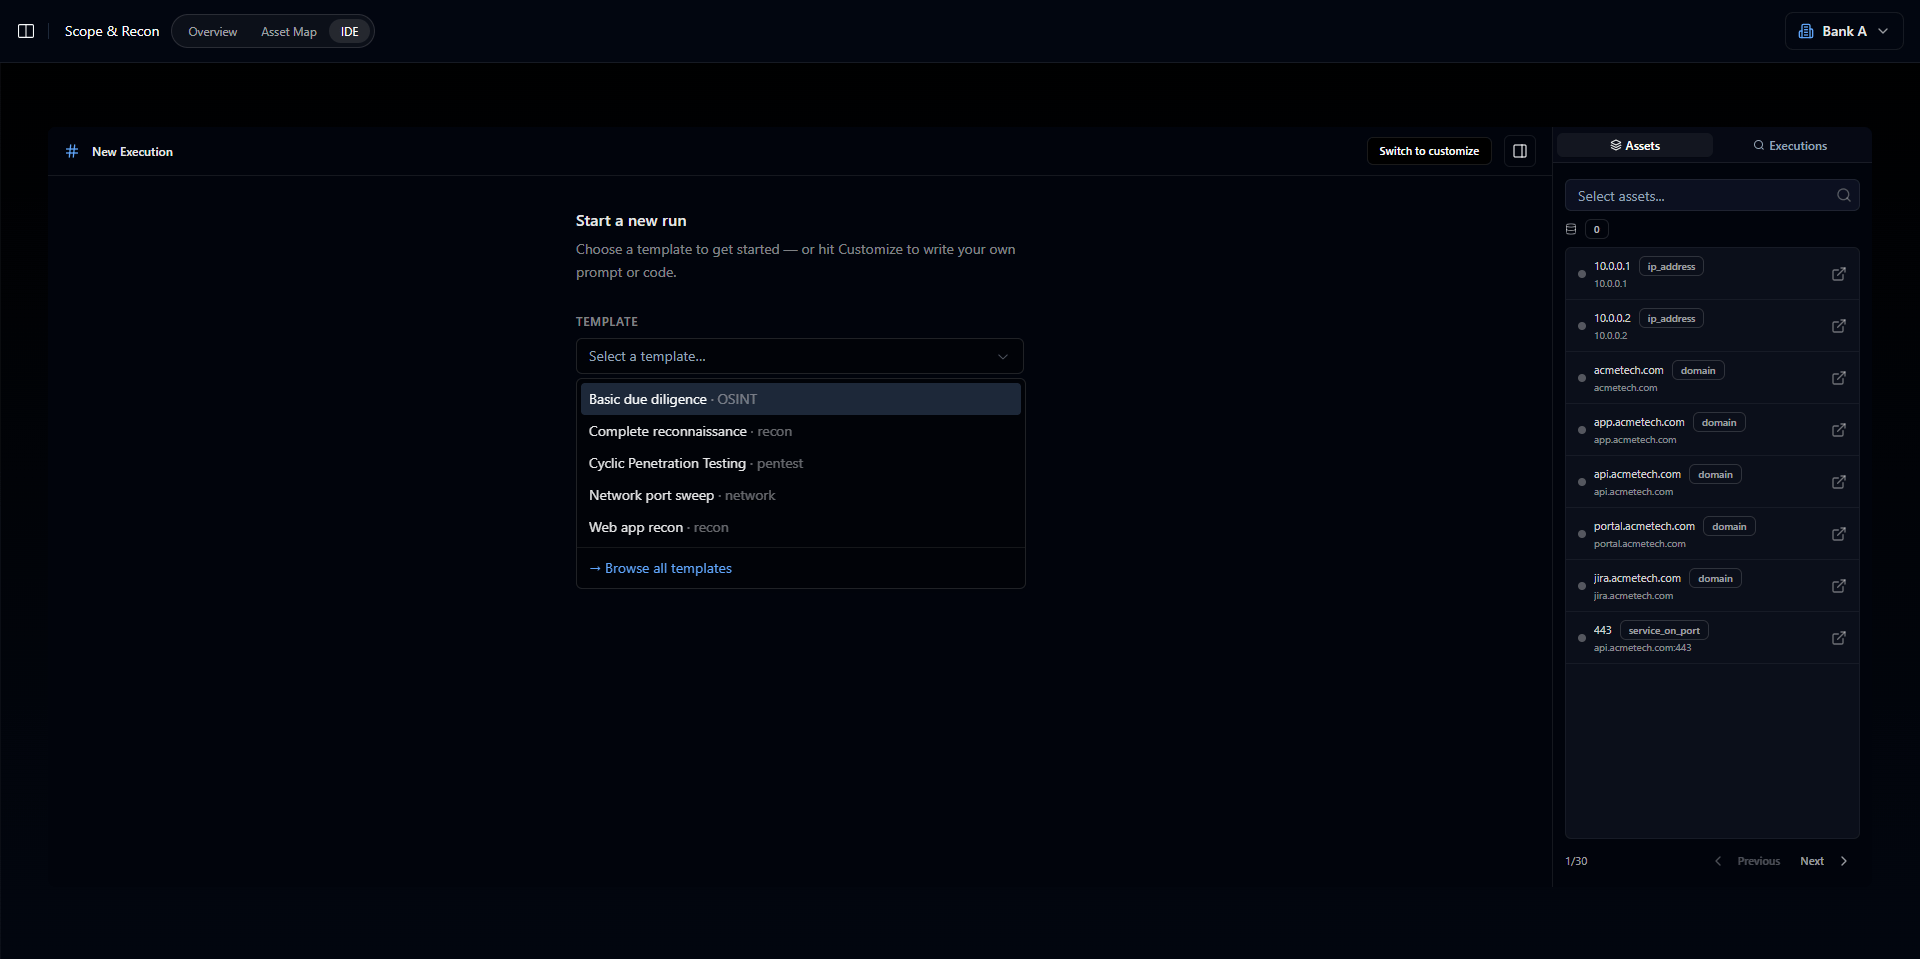 Pick the template that matches your goal. For this example, we'll use the **Basic due diligence** template.
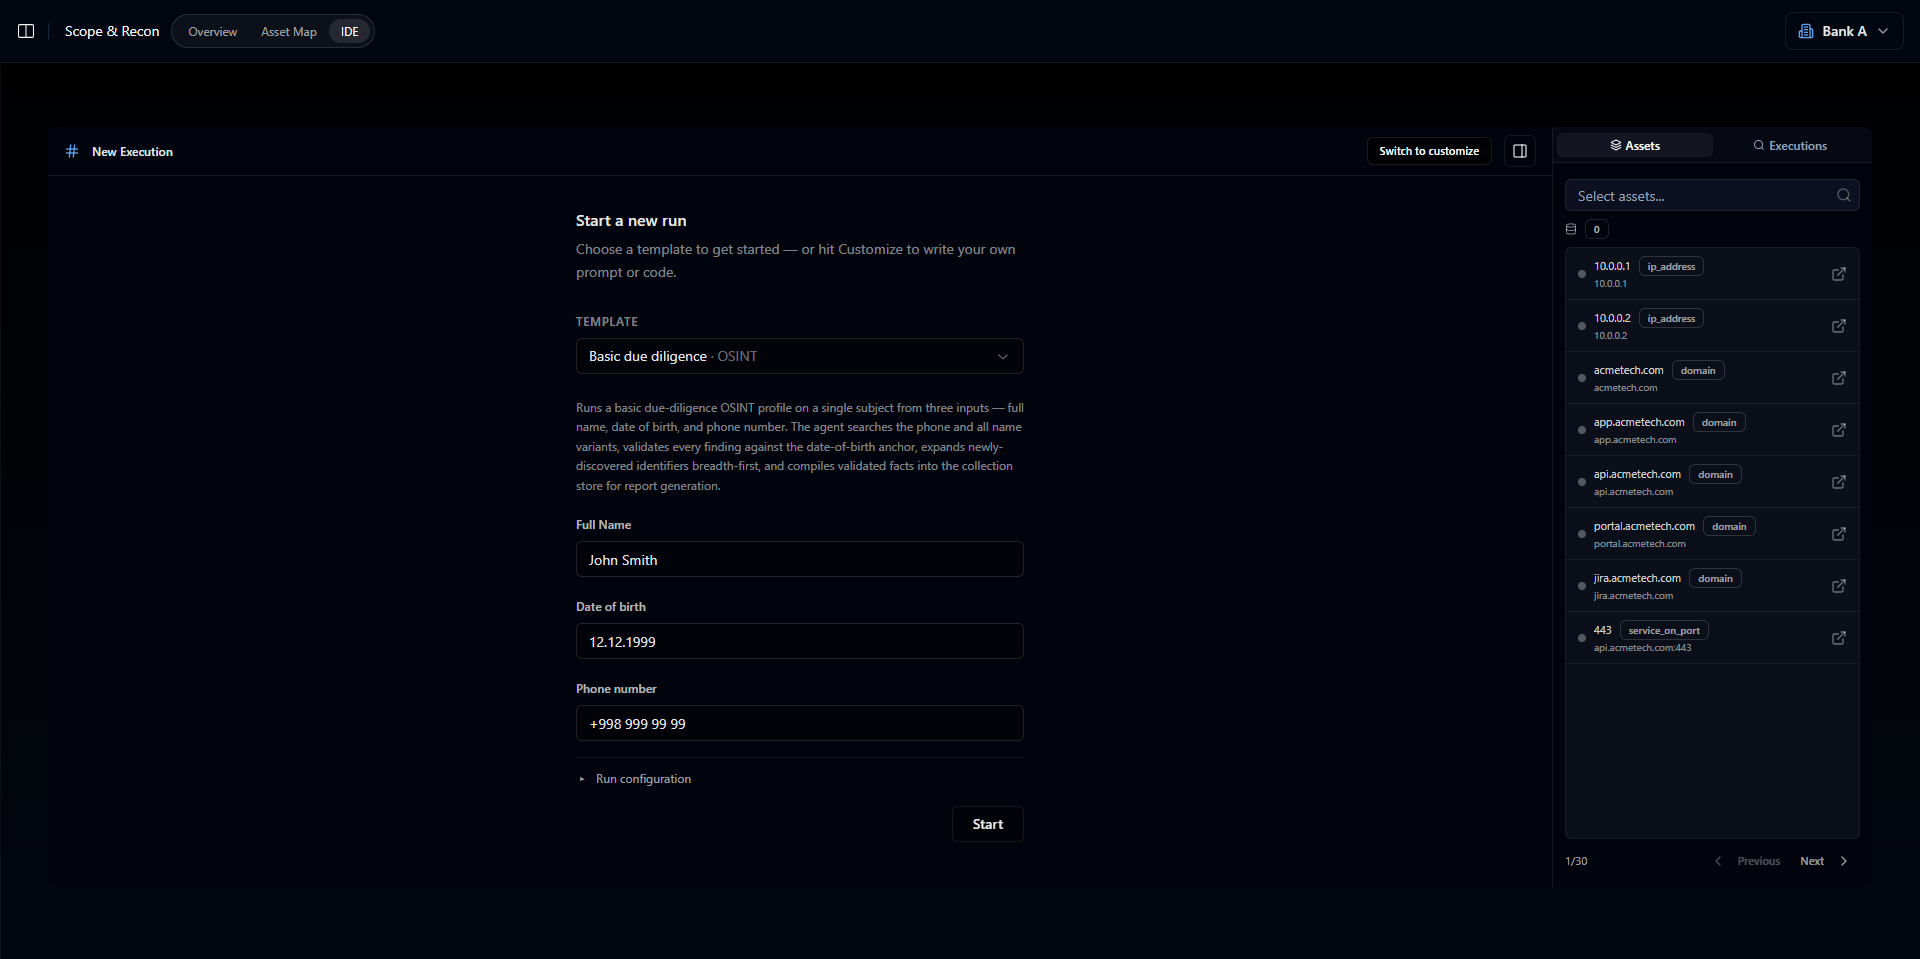 Fill in the form with whatever information you have about the target. In this example, we'll use the following:
* Name: John Doe
* Date of birth: 12.12.1990
* Phone number: +998 99 999 99 99
Then open the config drop-down and select **Auto-OSINT** as the service, not Auto-PT. All other fields can be left as they are.
Fill in the form with whatever information you have about the target. In this example, we'll use the following:
* Name: John Doe
* Date of birth: 12.12.1990
* Phone number: +998 99 999 99 99
Then open the config drop-down and select **Auto-OSINT** as the service, not Auto-PT. All other fields can be left as they are.
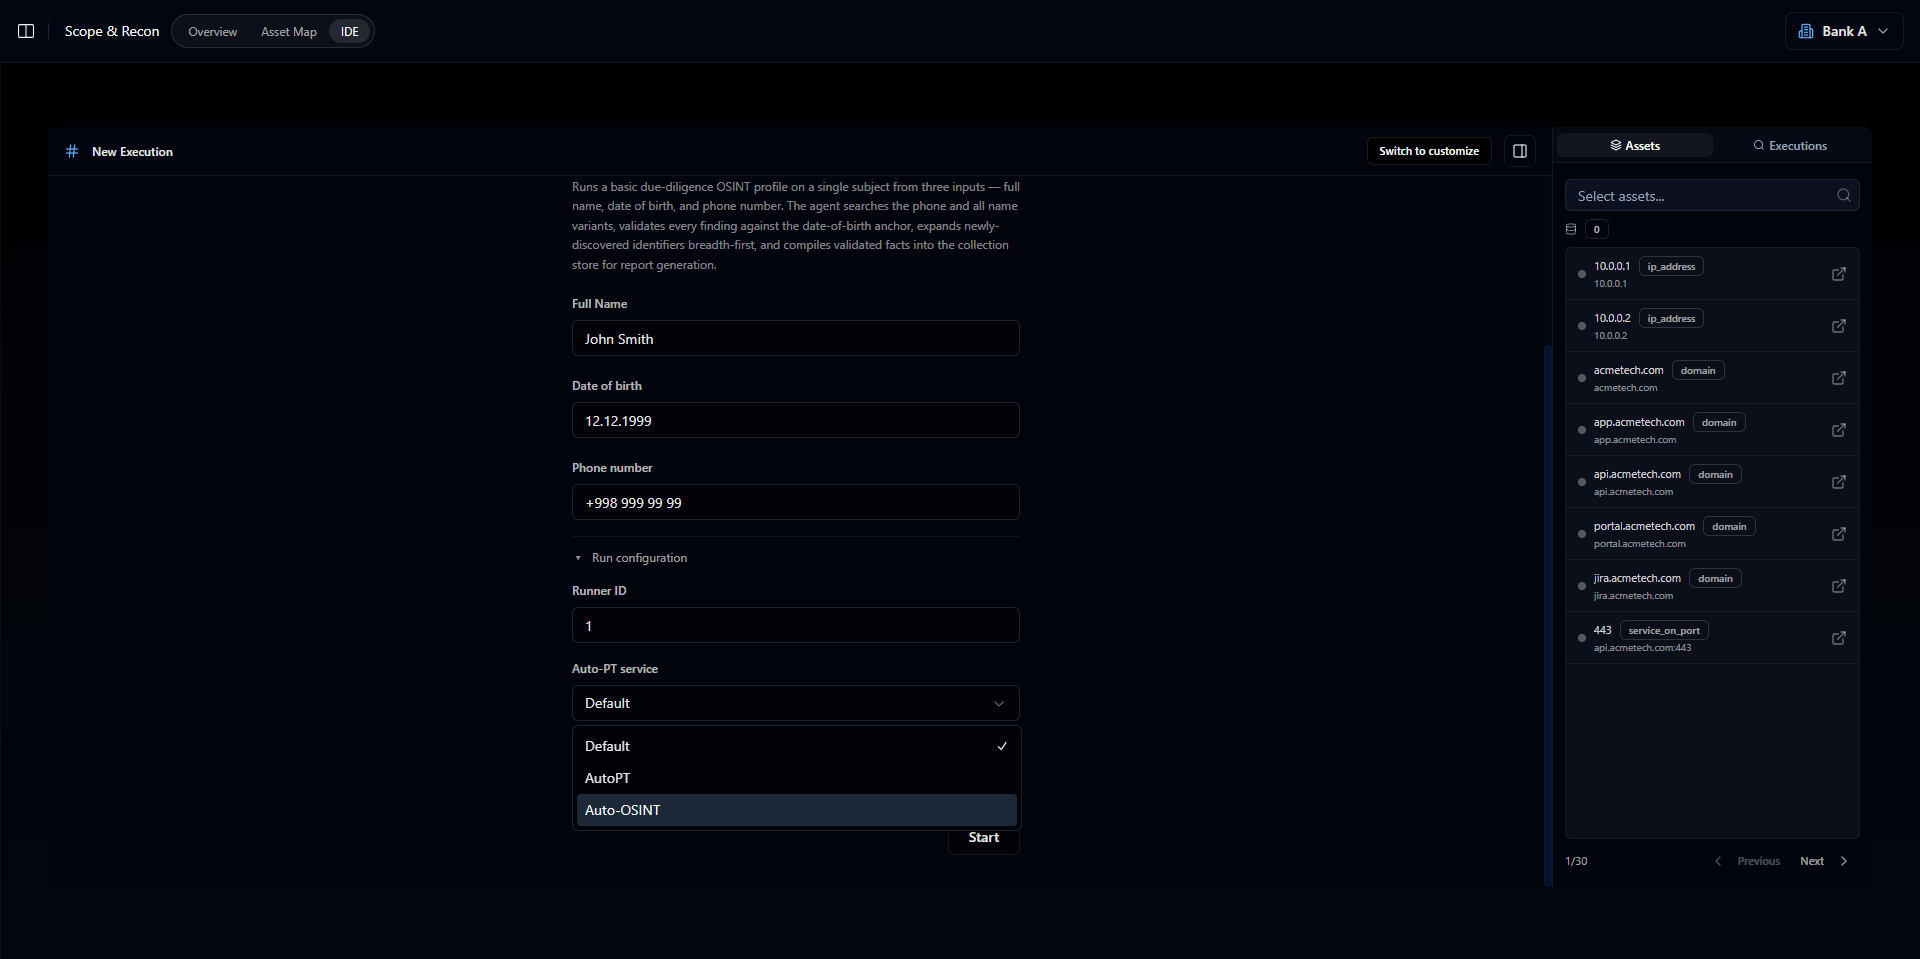 Click **Start**, and you're ready to run.
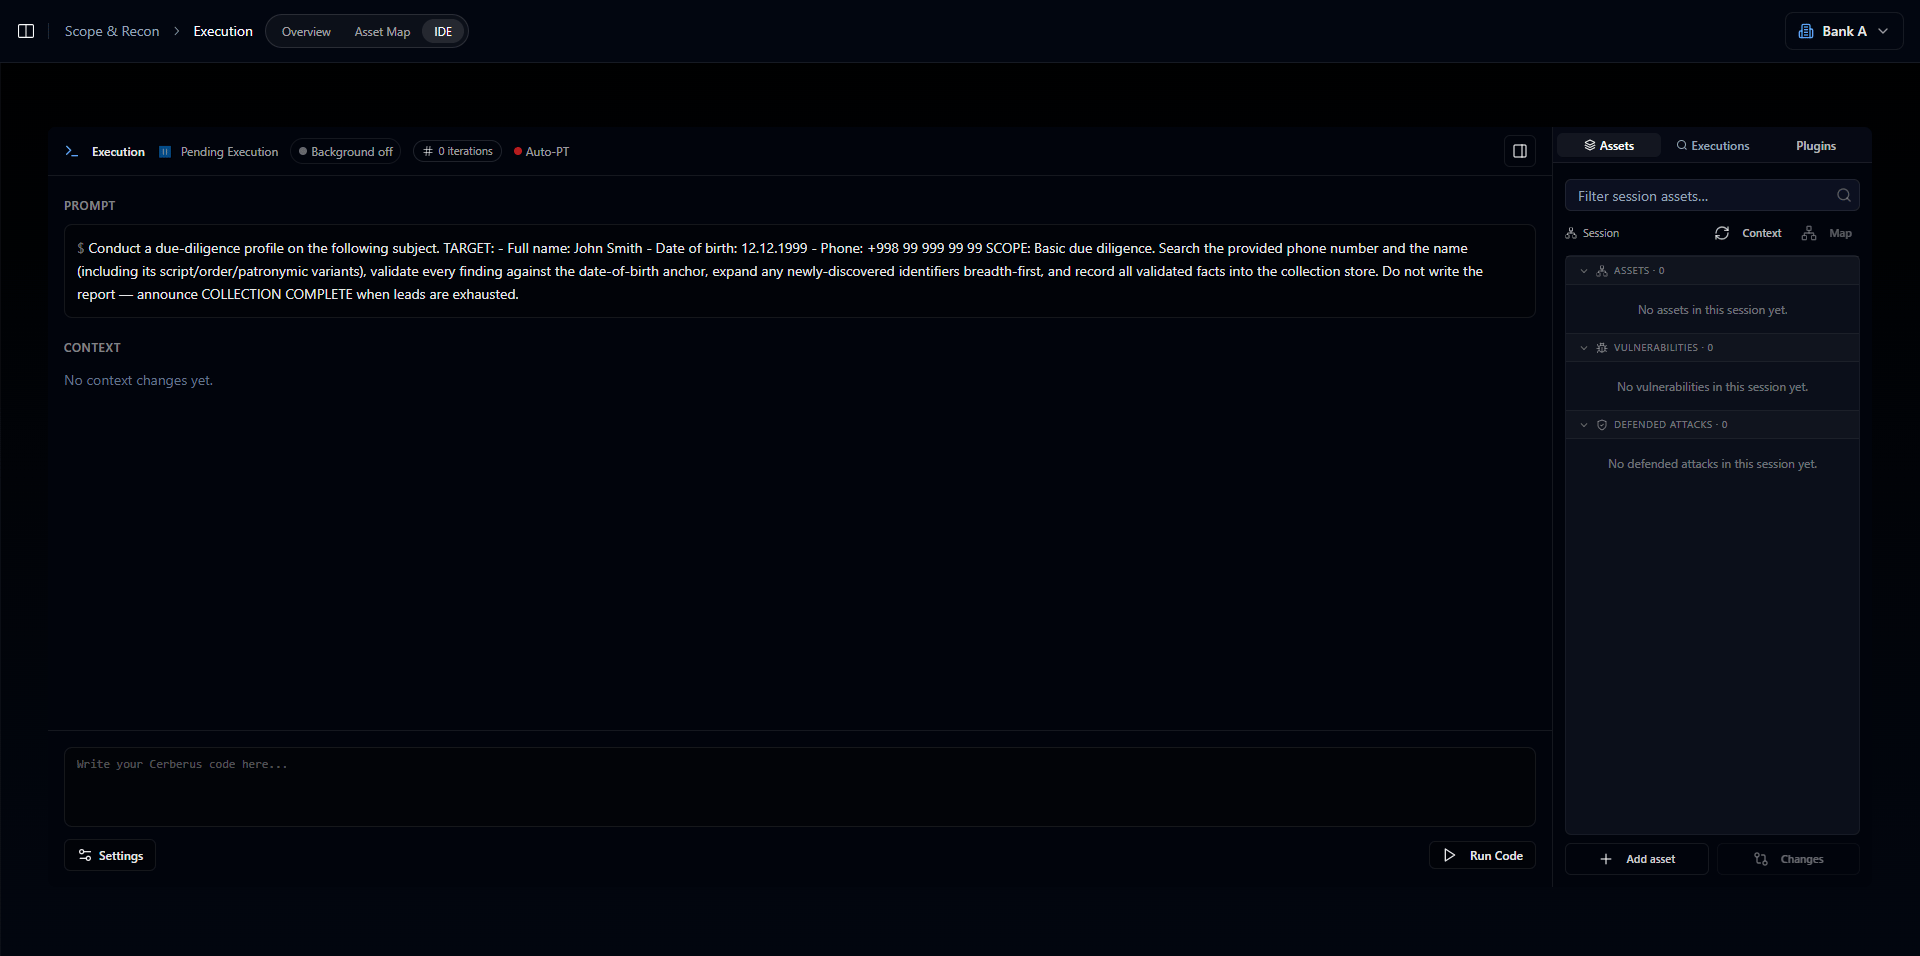 Once you click Start, you'll see the chat-style interface. To begin the OSINT run, click **Run Code** in the bottom-right corner.
## Running custom prompts
To write your own instructions, click **Switch to customize** on the right-hand side.
Once you click Start, you'll see the chat-style interface. To begin the OSINT run, click **Run Code** in the bottom-right corner.
## Running custom prompts
To write your own instructions, click **Switch to customize** on the right-hand side.
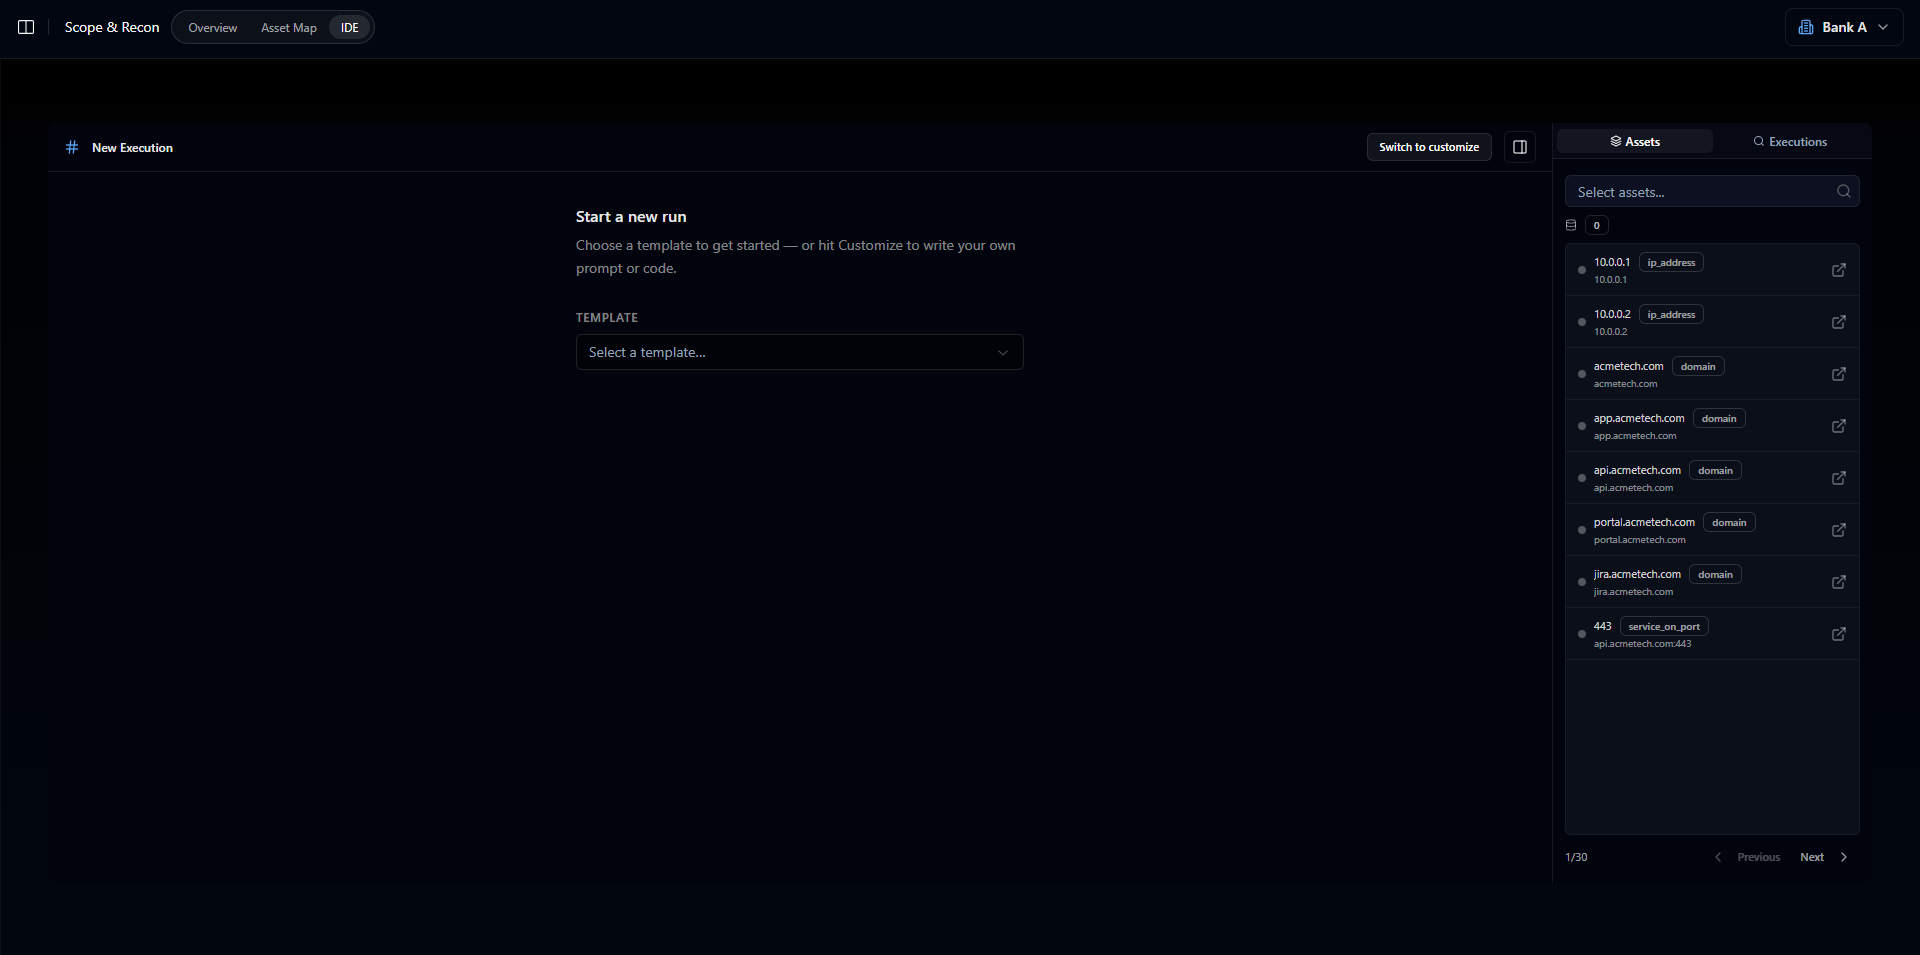 You'll now see a text input at the bottom along with a few settings. Switch the mode from **Generation** to **Pentest** in the bottom-left corner.
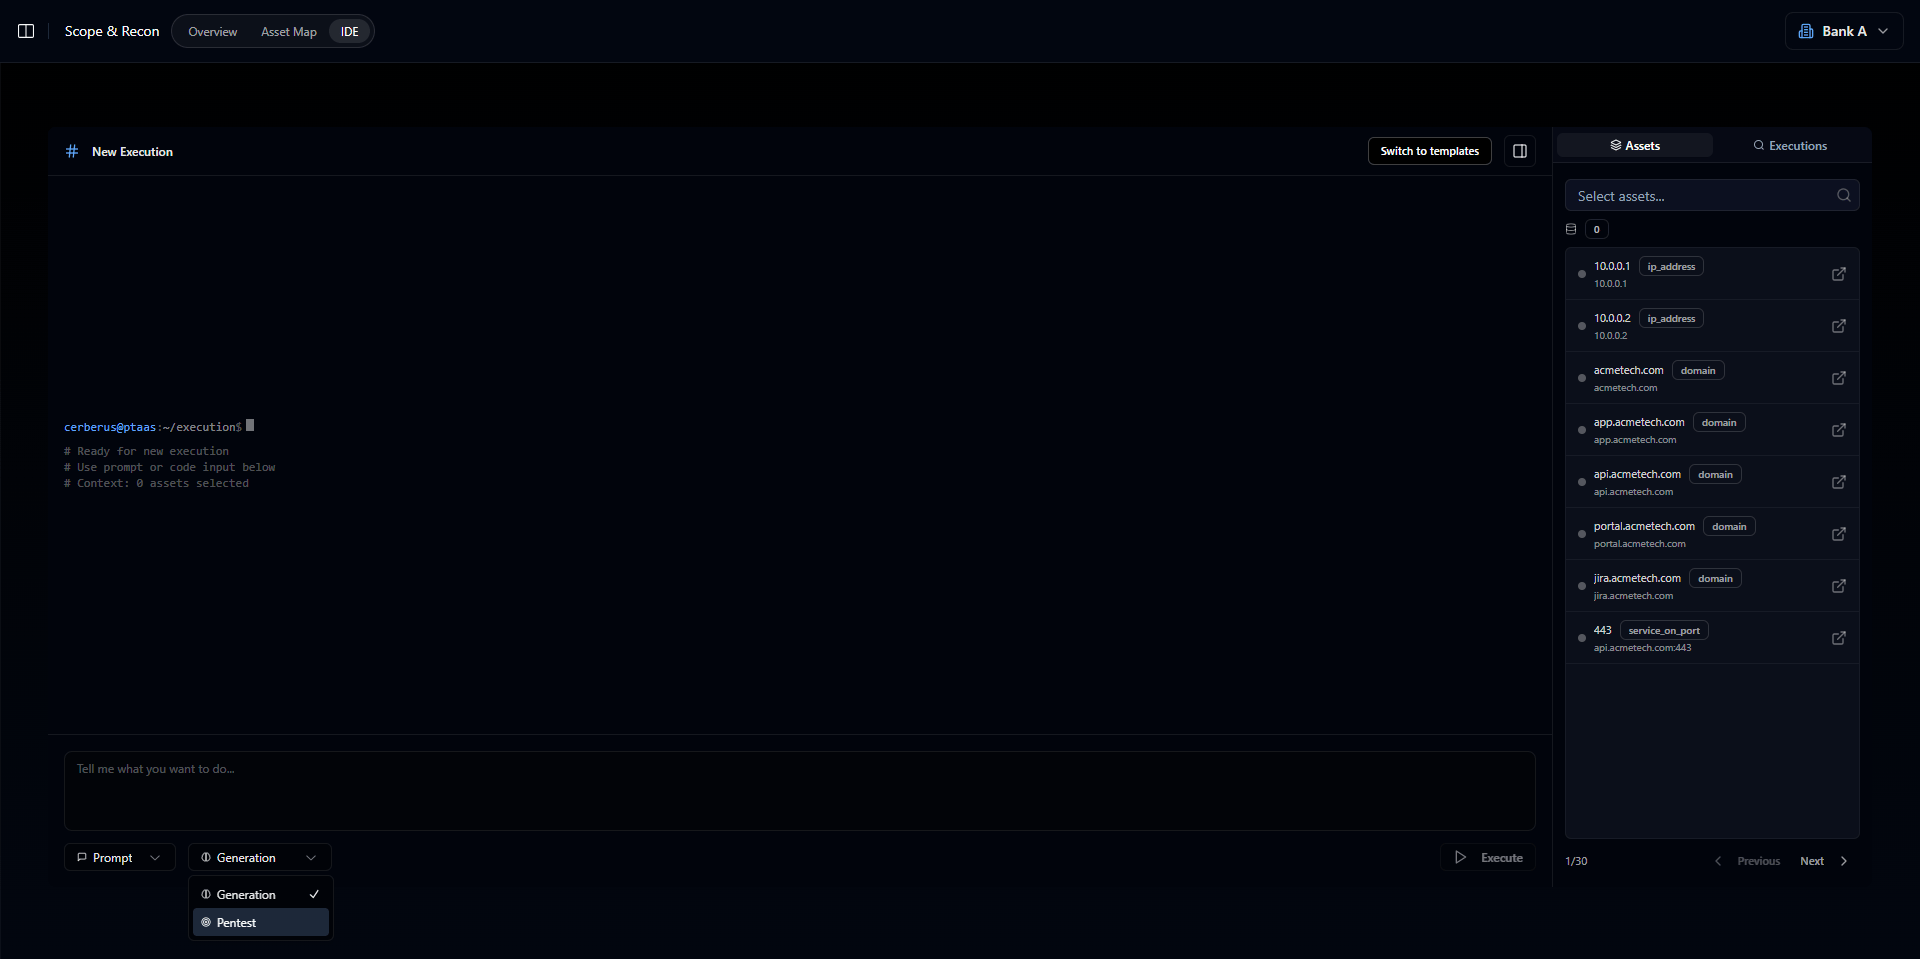 A few more setup fields appear. For now you can leave them as they are, except for the service - set it to **Auto-OSINT** - and then write your prompt. For this example we used the following:
```
Hi, I need a digital footprint profile on a guy named Chris Atkinson. Phone number is +998 77 777 77 77. He studied at public school number 45 and lived in Samarkand between 2004 and 2009. Focus on his online presence: social media, messenger accounts, any digital traces you can find and verify.
```
A few more setup fields appear. For now you can leave them as they are, except for the service - set it to **Auto-OSINT** - and then write your prompt. For this example we used the following:
```
Hi, I need a digital footprint profile on a guy named Chris Atkinson. Phone number is +998 77 777 77 77. He studied at public school number 45 and lived in Samarkand between 2004 and 2009. Focus on his online presence: social media, messenger accounts, any digital traces you can find and verify.
```
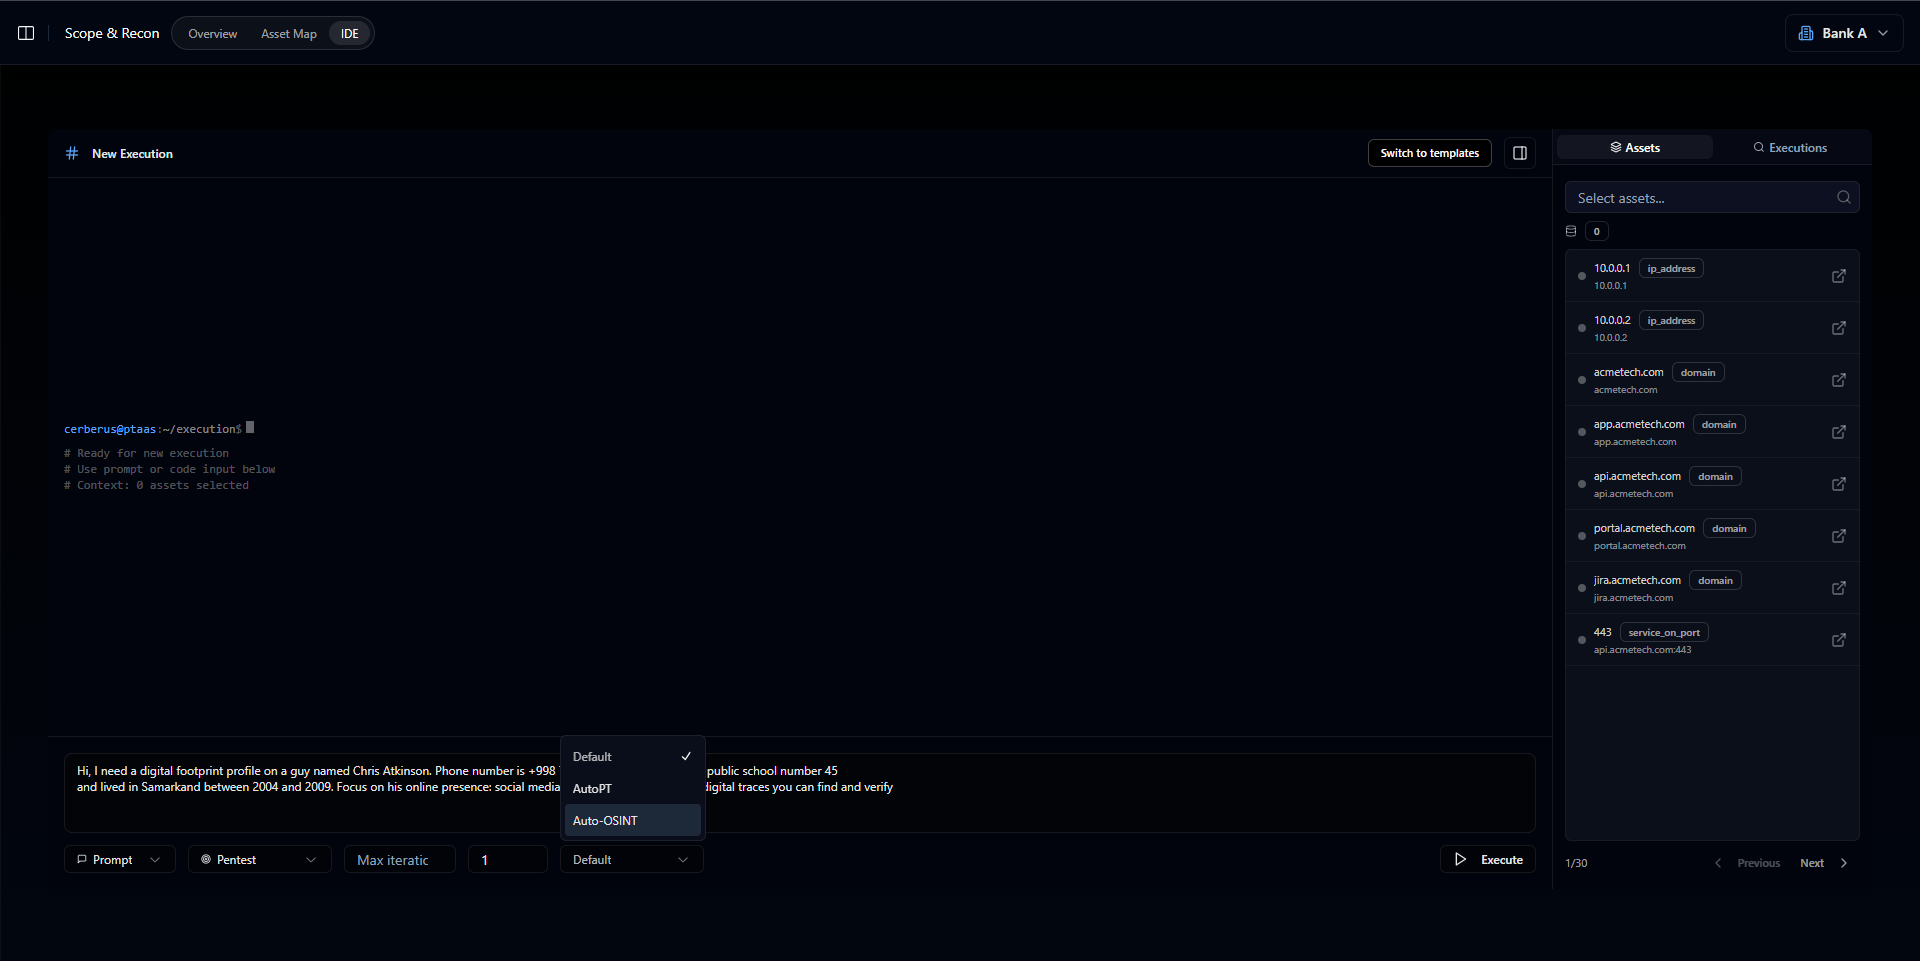 Now click **Execute** and auto-osint will start its work.
## Generating a report
Either way you run it - template or custom - you can generate a report from the results.
When the agent finishes, it will let you know and suggest generating a report. To do so, click the **Plugins** button on the right-hand side. You'll be greeted with the following window:
Now click **Execute** and auto-osint will start its work.
## Generating a report
Either way you run it - template or custom - you can generate a report from the results.
When the agent finishes, it will let you know and suggest generating a report. To do so, click the **Plugins** button on the right-hand side. You'll be greeted with the following window:
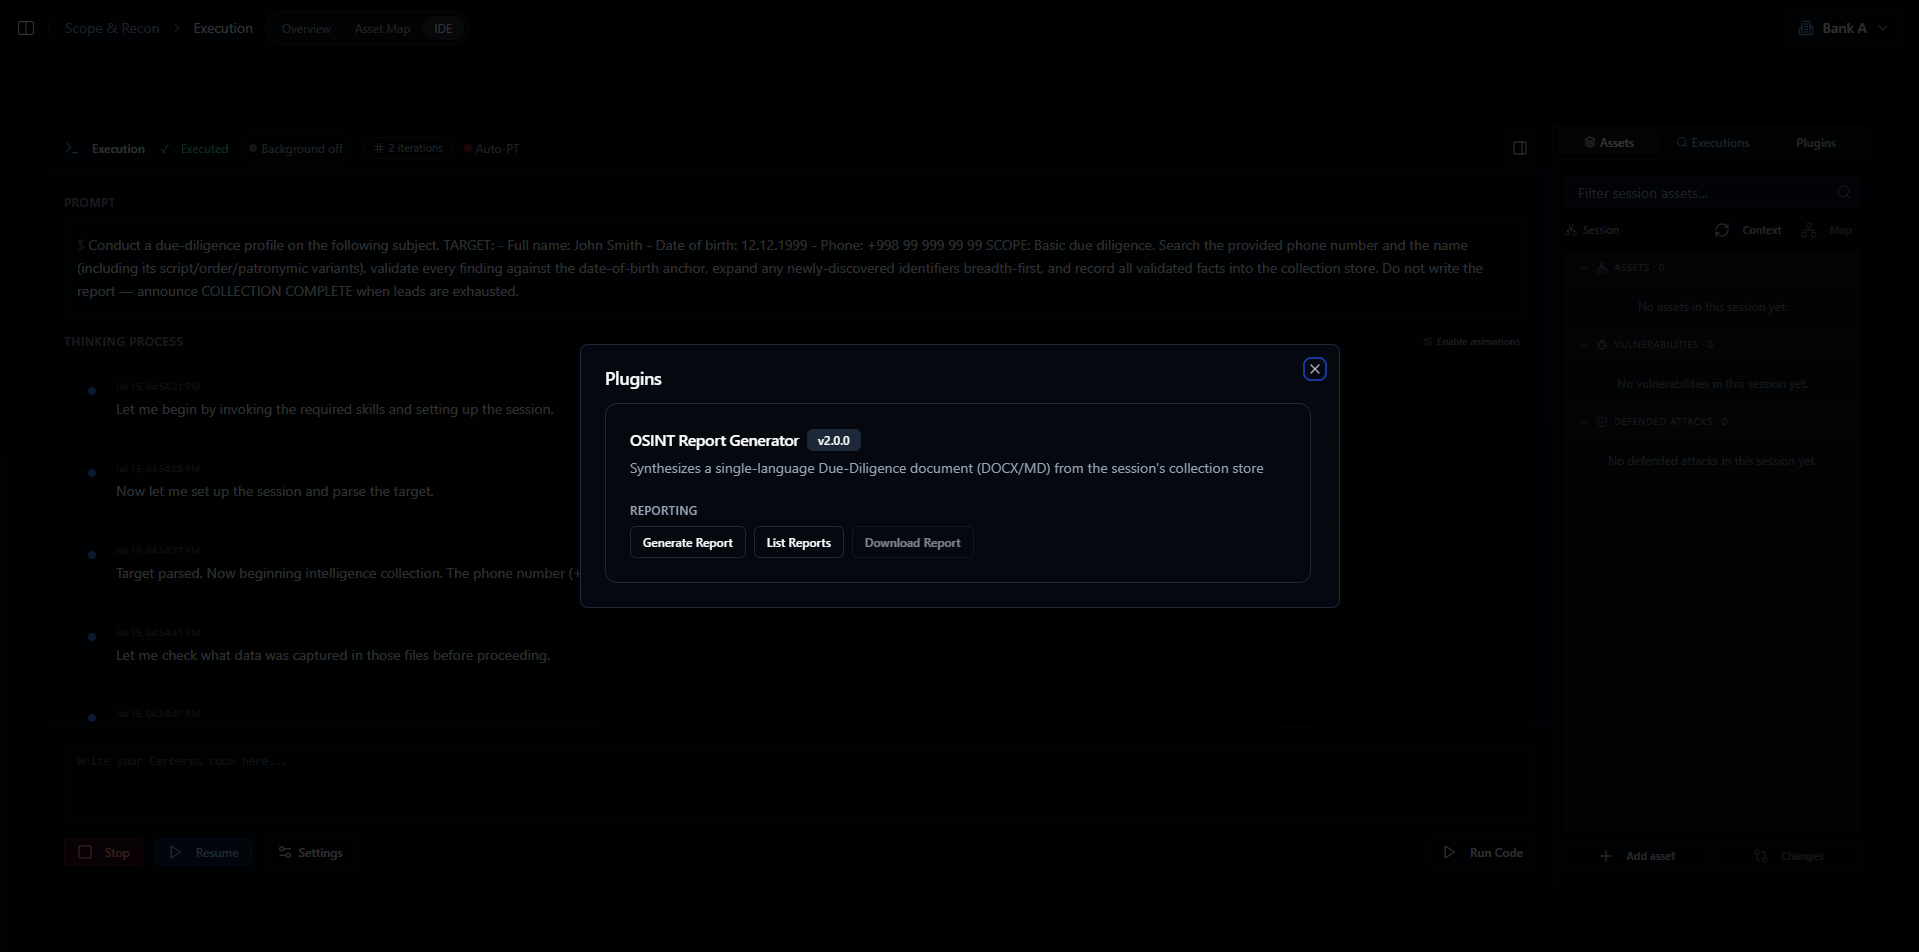 Click **Generate report**. From here you can set the report format and language, and give the report a name.
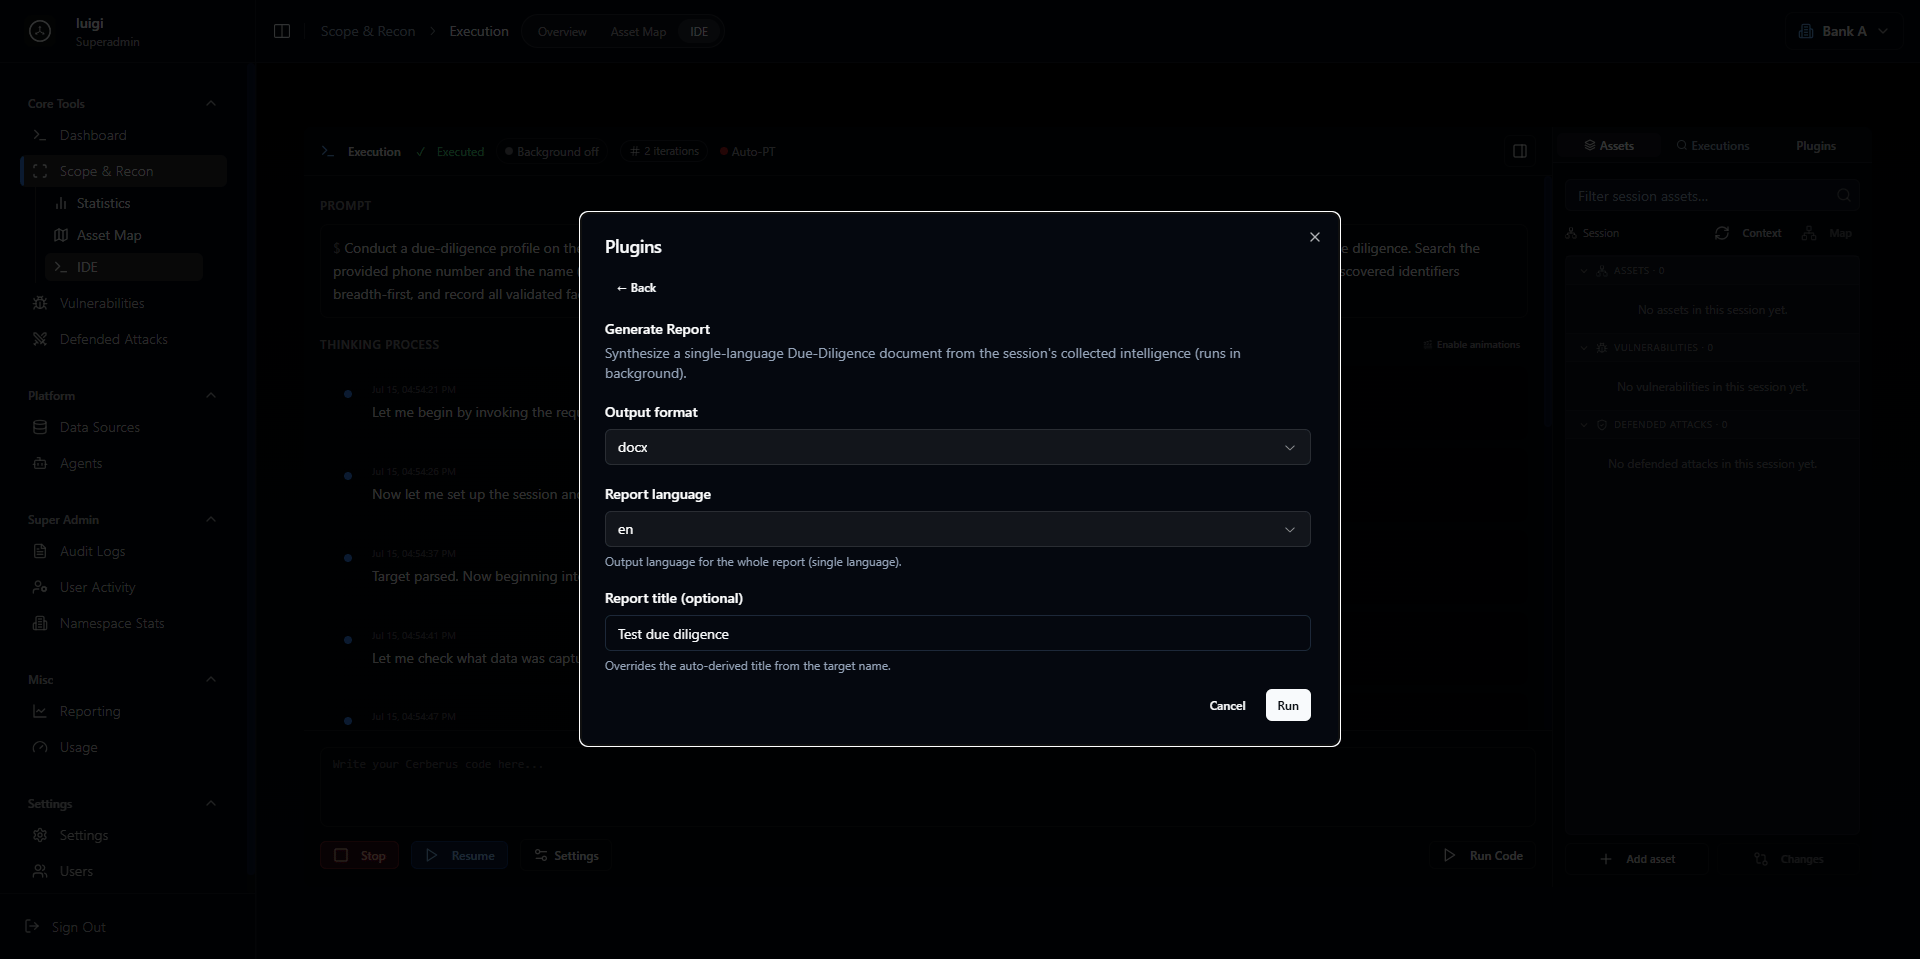 * **Available languages:** English (`en`), Russian (`ru`)
* **Available formats:** Word document (`docx`), Markdown (`md`)
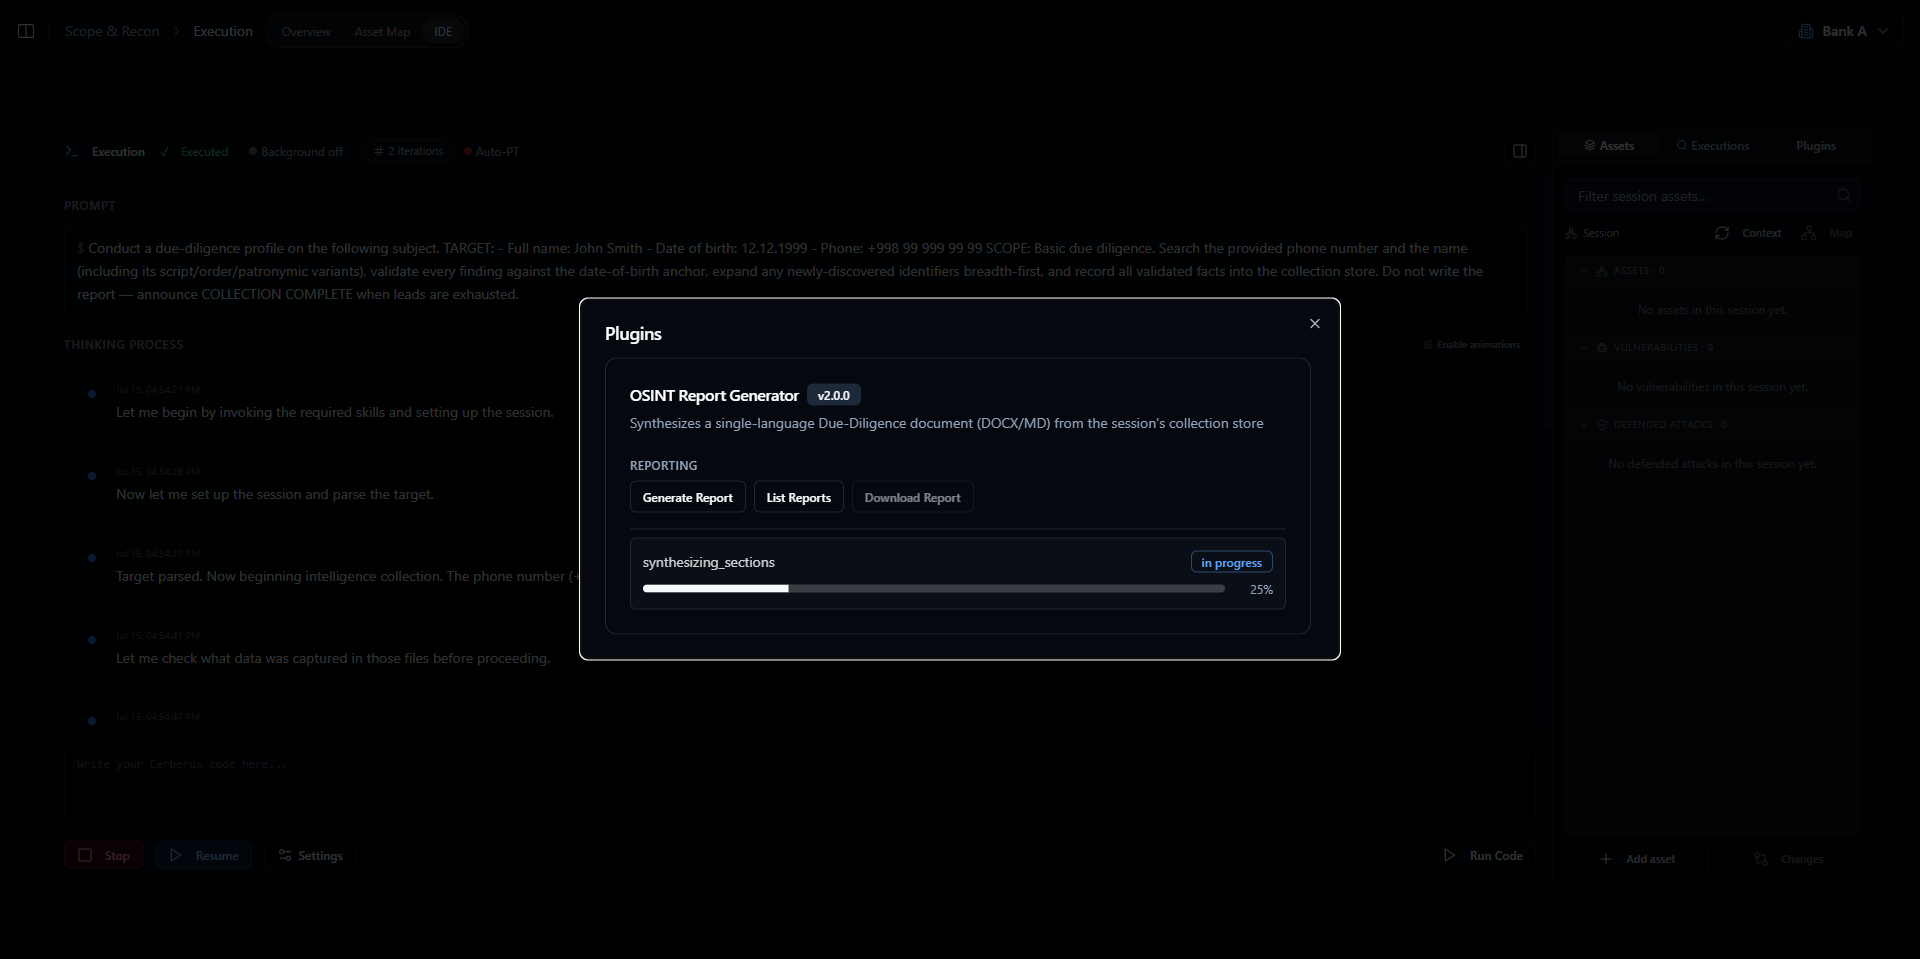
Then click **Run**. A progress bar will appear showing the generation in real time.
* **Available languages:** English (`en`), Russian (`ru`)
* **Available formats:** Word document (`docx`), Markdown (`md`)
Then click **Run**. A progress bar will appear showing the generation in real time.
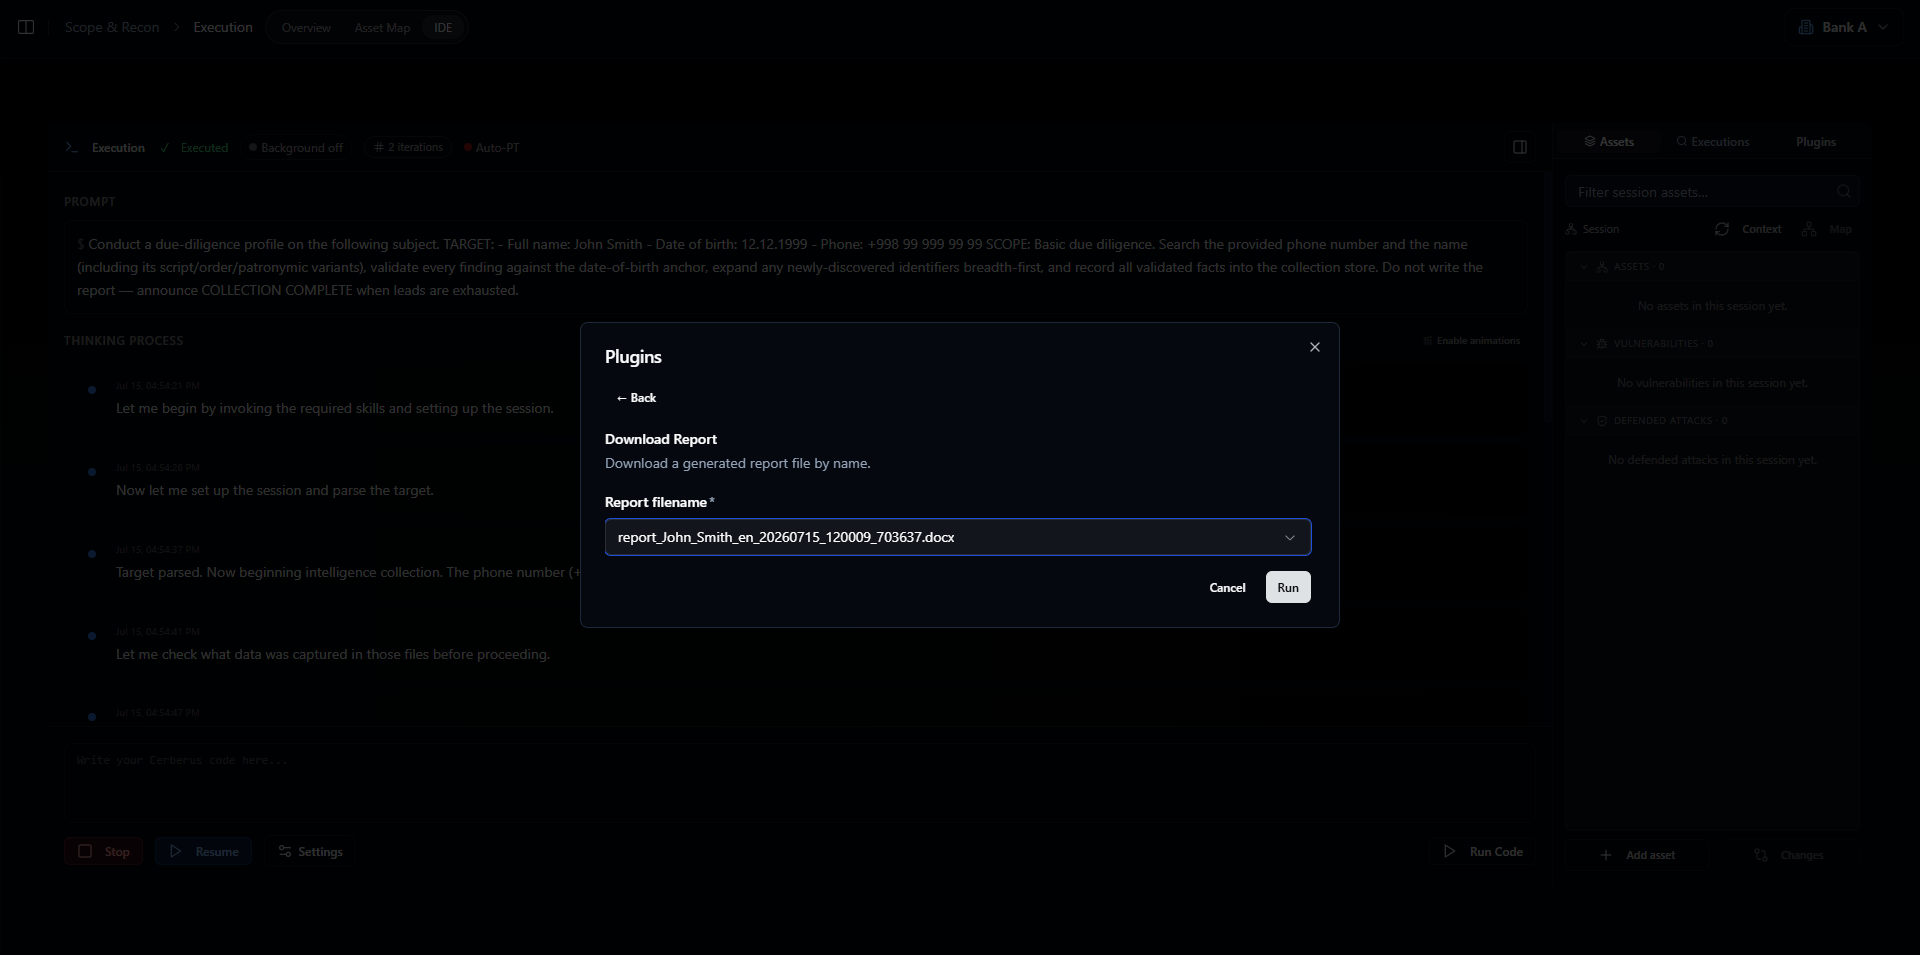
 Once it's done, click **Download Report**, select the report you want, and click **Run**. A download button will appear at the bottom.
 That's your finished OSINT deliverable, ready to hand off or fold into a wider engagement.