> ## Documentation Index
> Fetch the complete documentation index at: https://docs-cerberus.c7-security.com/llms.txt
> Use this file to discover all available pages before exploring further.
# Starting your first pentest
> A guide to starting your first pentest with Cerberus and AutoPT
This guide walks you through setting up and running your first pentest with Cerberus.
### Step 1: Access the Scope and Recon tab
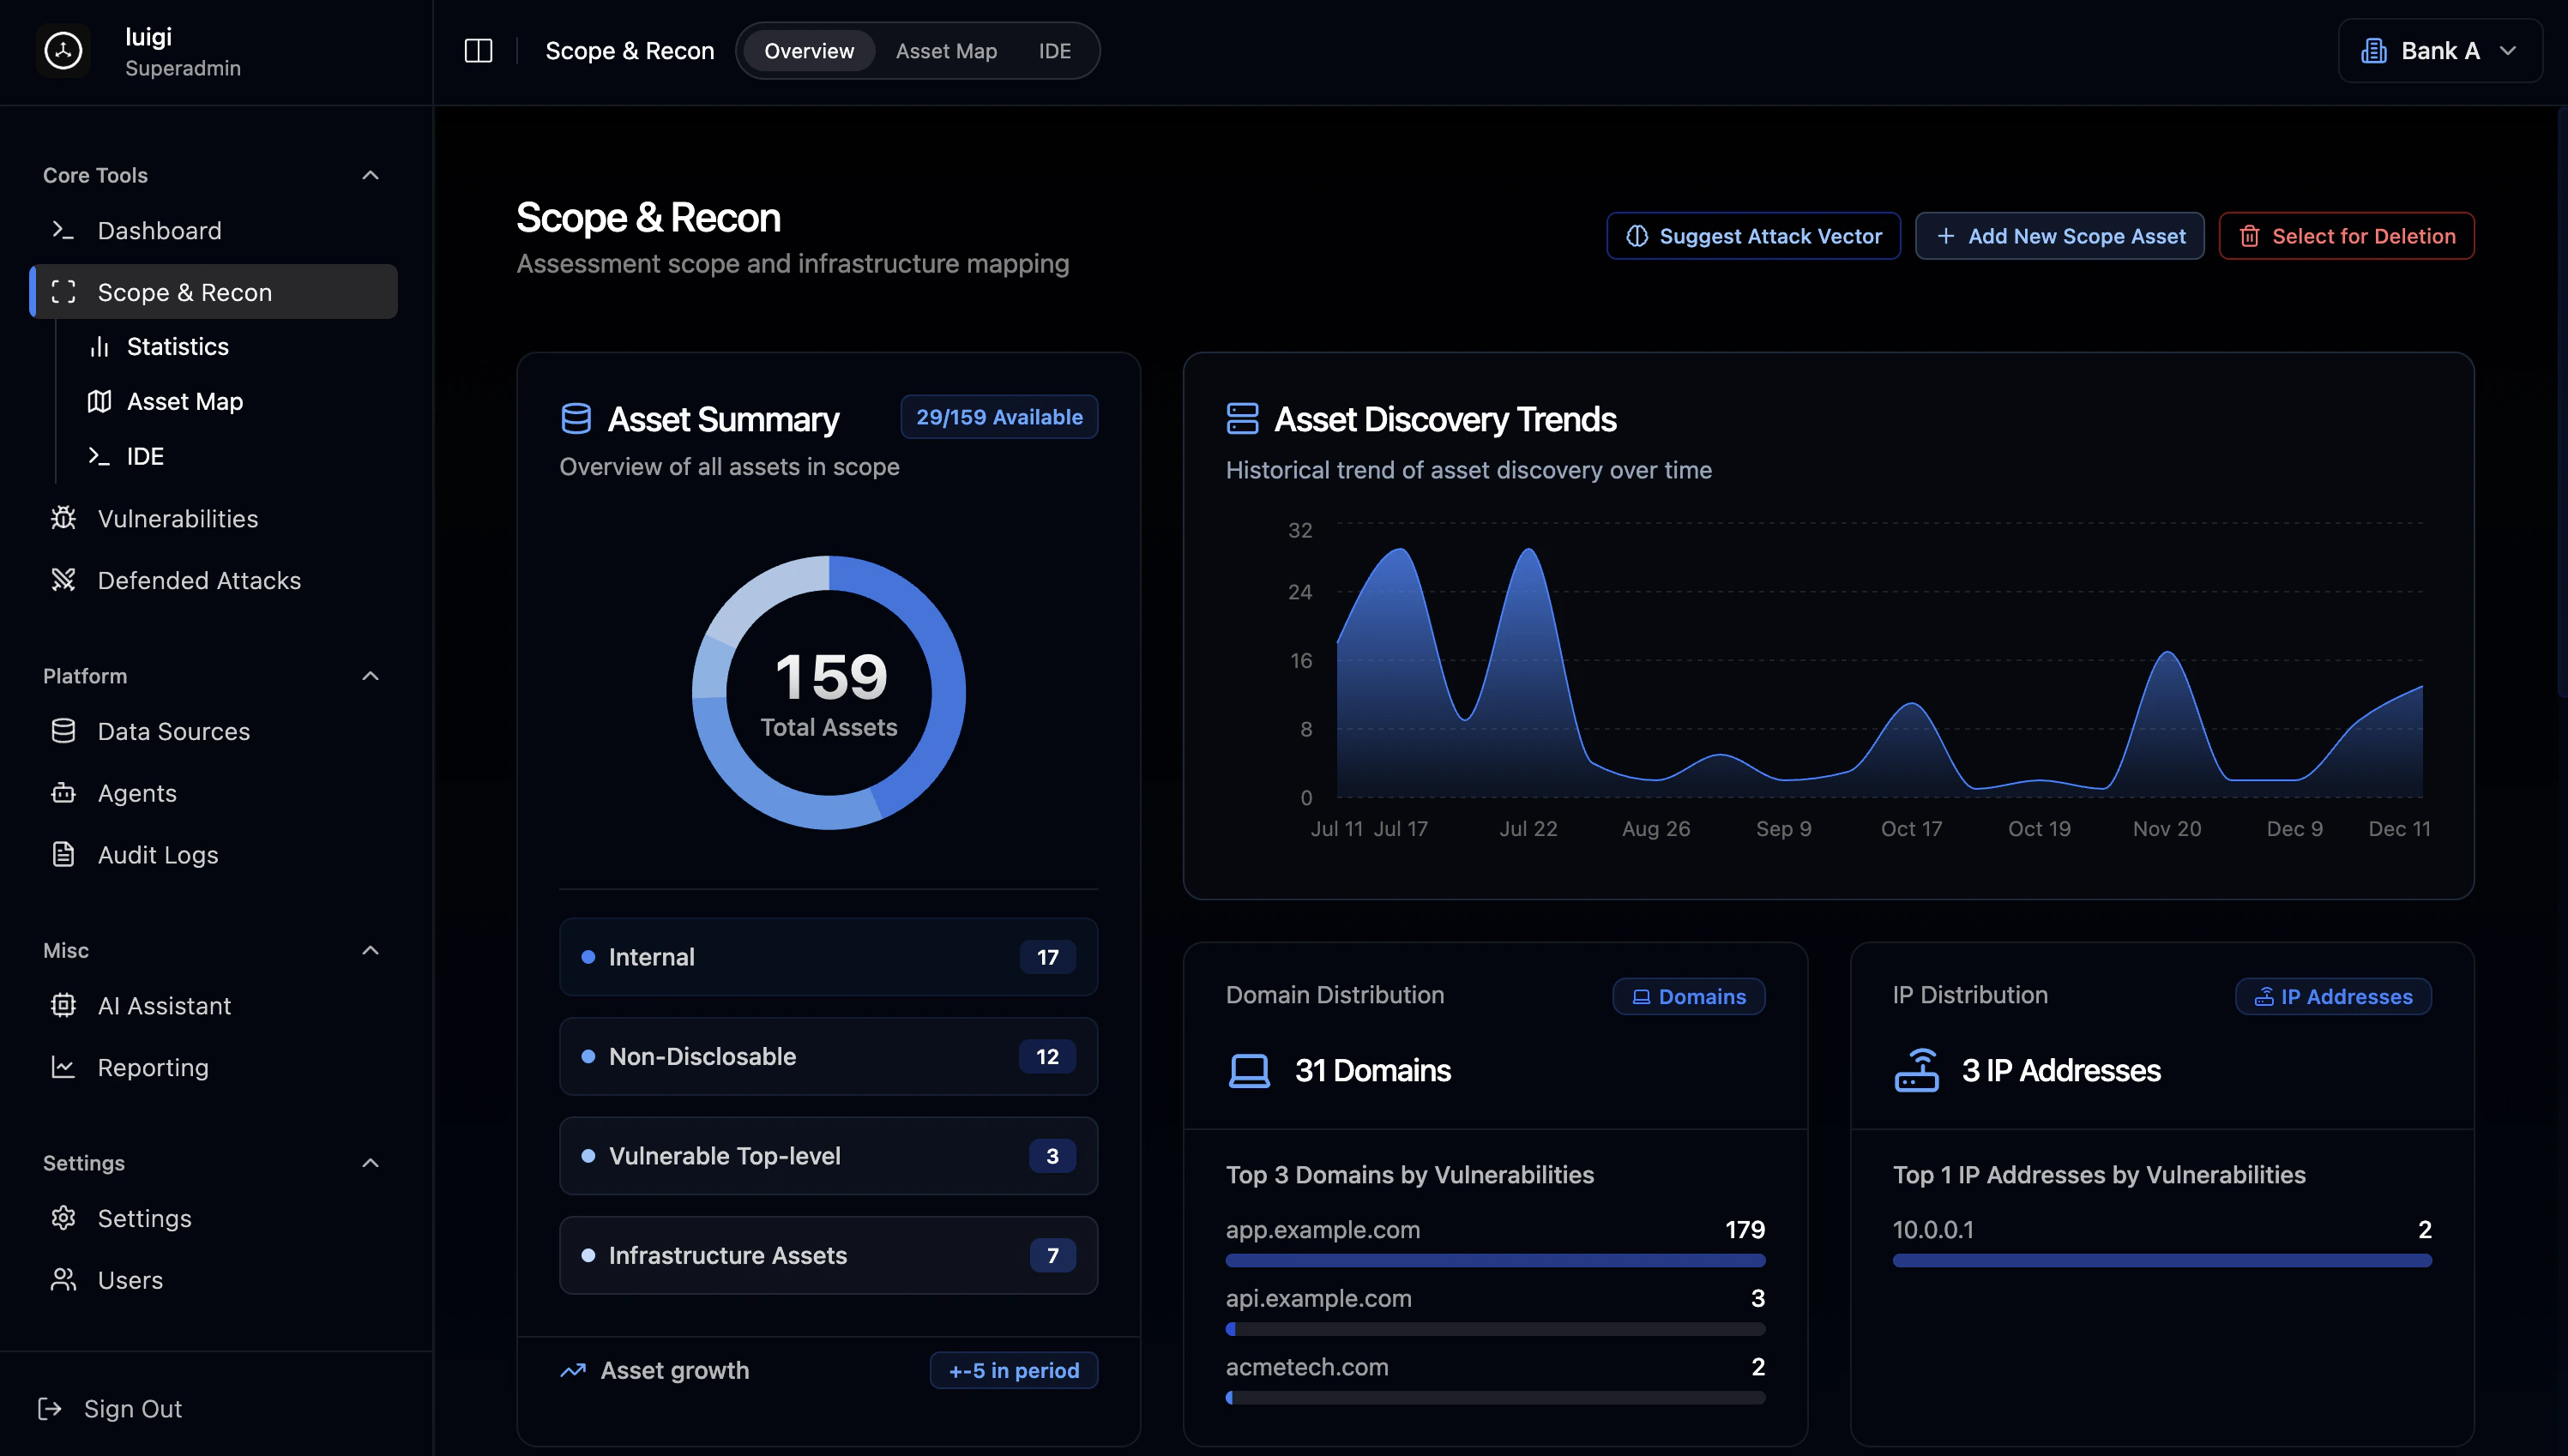
After logging in, go to the **Scope and Recon** tab. This is where you define your target assets. Once the pentest starts, you'll see real-time updates here: assets being tested, vulnerabilities found, and attacks that were blocked.
 ### Step 2: Define your scope and add target assets
Click **"Add New Scope Asset"** on the right side of the page. You can add:
* Domains (e.g., `example.com`)
* IP addresses (e.g., `10.0.0.1`)
* Services (e.g., `http`, `https`, `ssh`, `ftp`)
* People (e.g., security analyst, developer) - they can be targets of social engineering attacks
* Objects (e.g., files, API endpoints, subfolders)
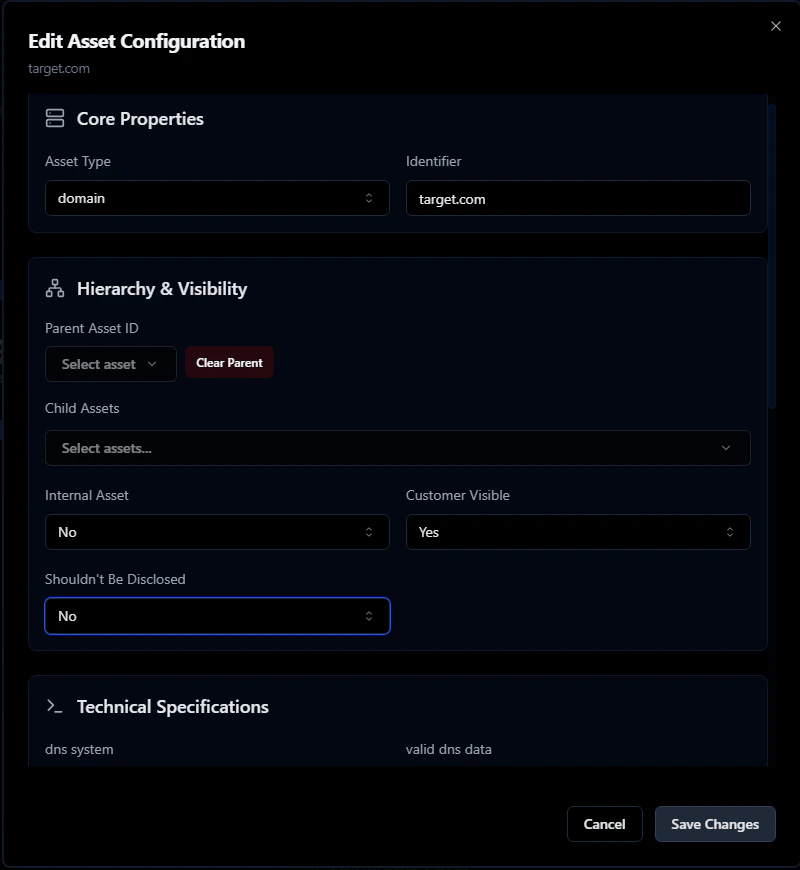
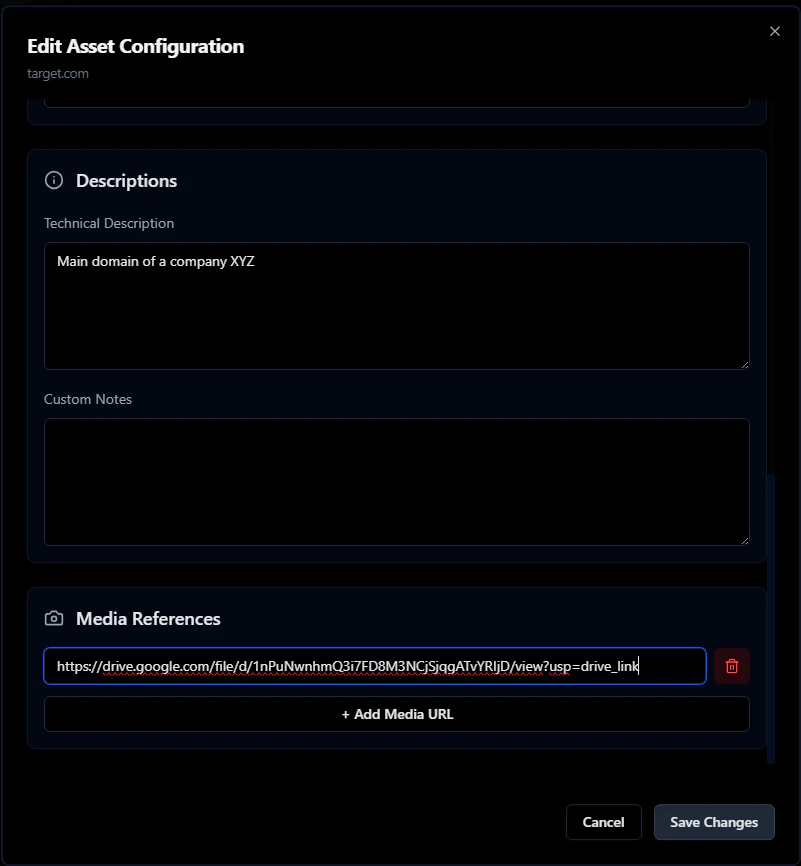
For this walkthrough, we'll add two assets: `target.com` and an HTTP service on port 443.
Fill in the other fields too: DNS system, relationships between assets, screenshots, etc.
Start with the domain `target.com`:
### Step 2: Define your scope and add target assets
Click **"Add New Scope Asset"** on the right side of the page. You can add:
* Domains (e.g., `example.com`)
* IP addresses (e.g., `10.0.0.1`)
* Services (e.g., `http`, `https`, `ssh`, `ftp`)
* People (e.g., security analyst, developer) - they can be targets of social engineering attacks
* Objects (e.g., files, API endpoints, subfolders)
For this walkthrough, we'll add two assets: `target.com` and an HTTP service on port 443.
Fill in the other fields too: DNS system, relationships between assets, screenshots, etc.
Start with the domain `target.com`:
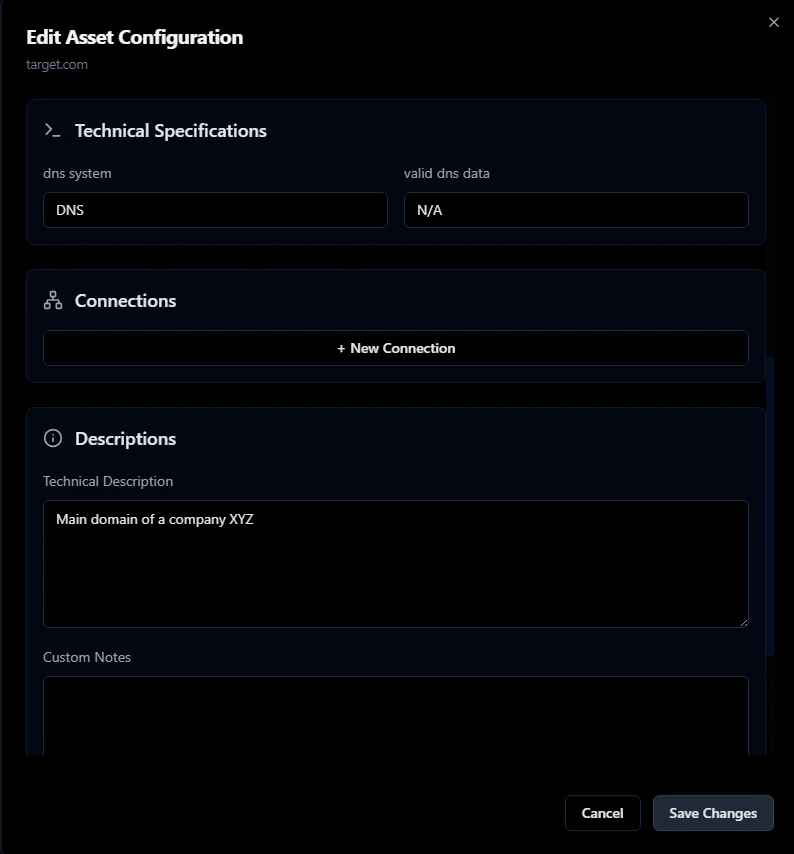
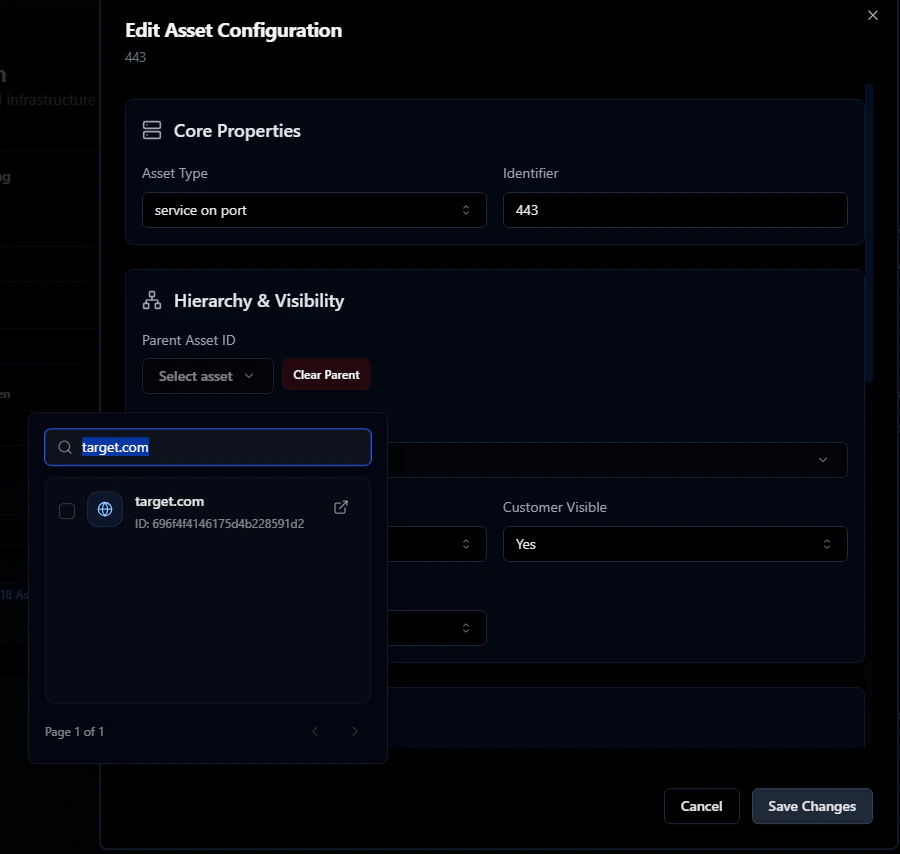
 Now add the HTTP service on port 443. Set `target.com` as the parent - this links the service to its domain.
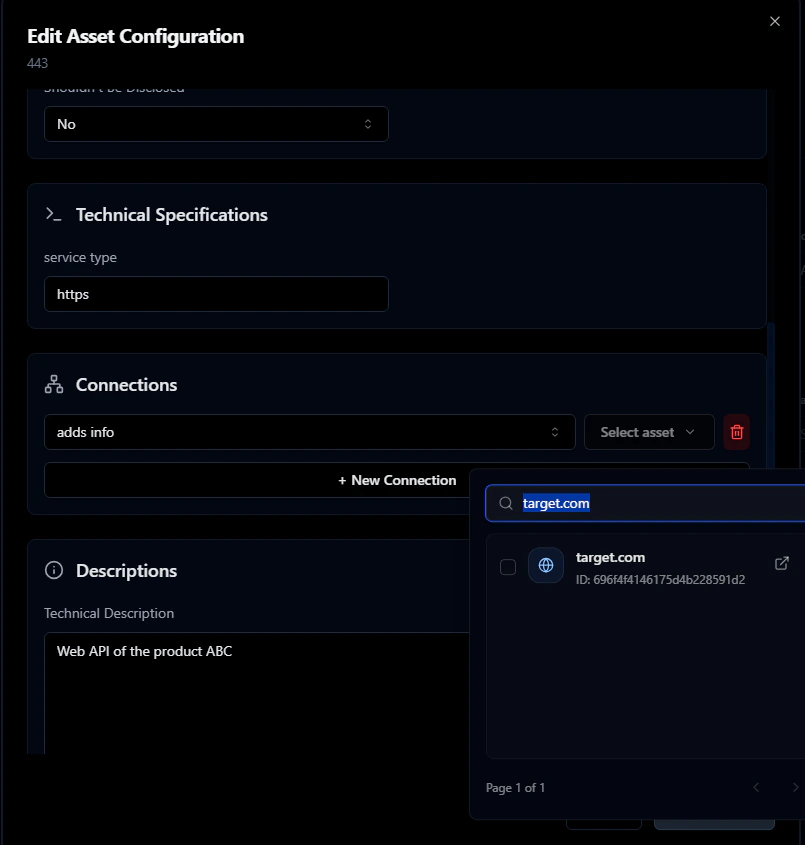
 You can also define relationships between assets. For example, an HTTPS service might expose debugging info about its parent domain. Use "add info link" to capture these connections.
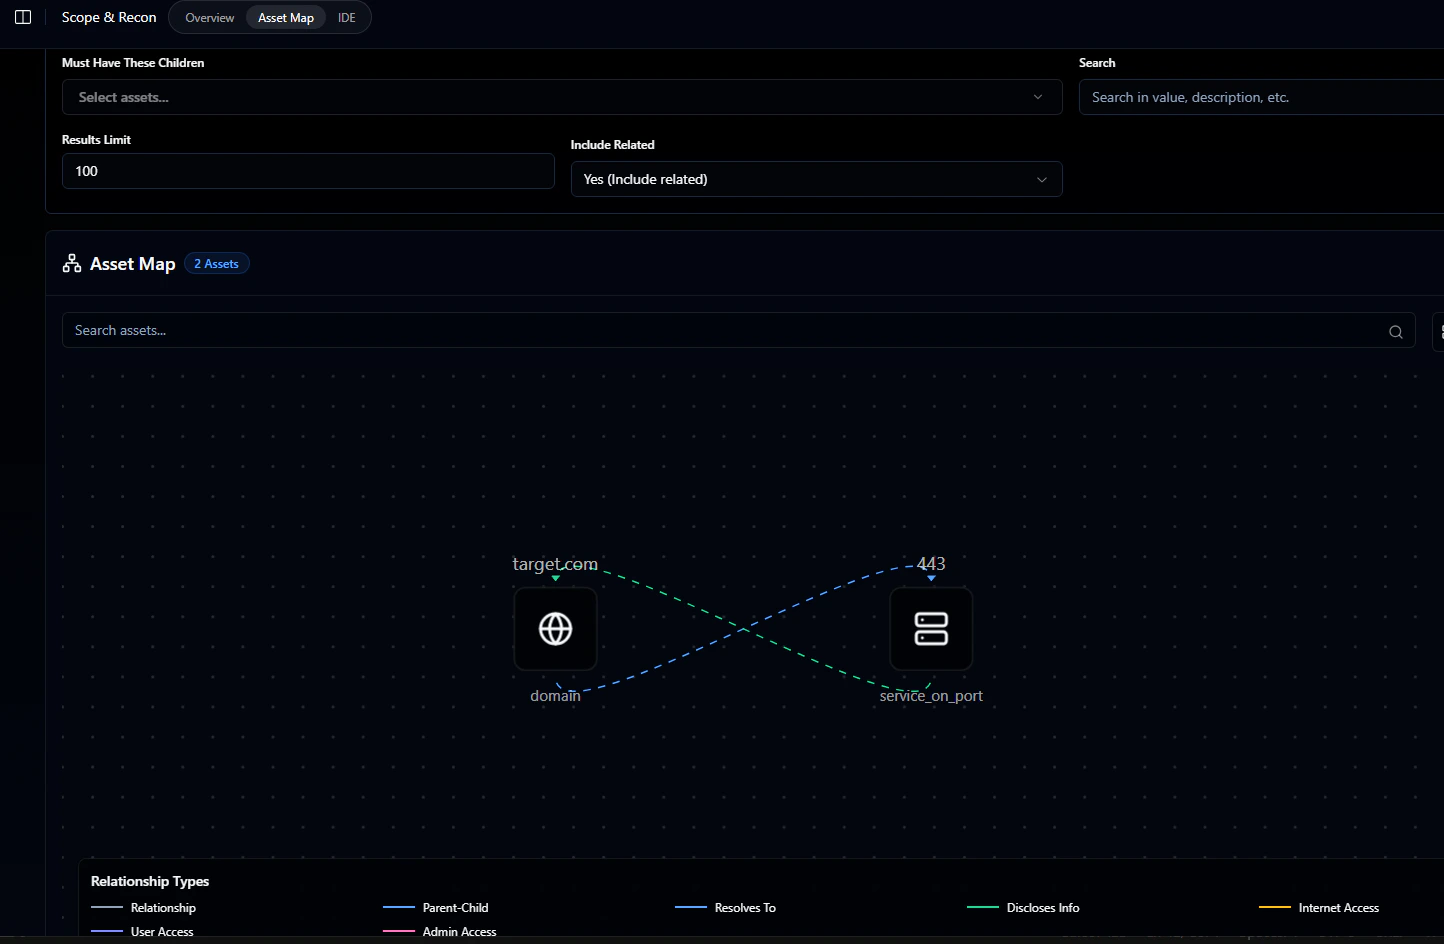
 Check the asset map to confirm everything is set up correctly:
 ### Step 3: Run your first prompt
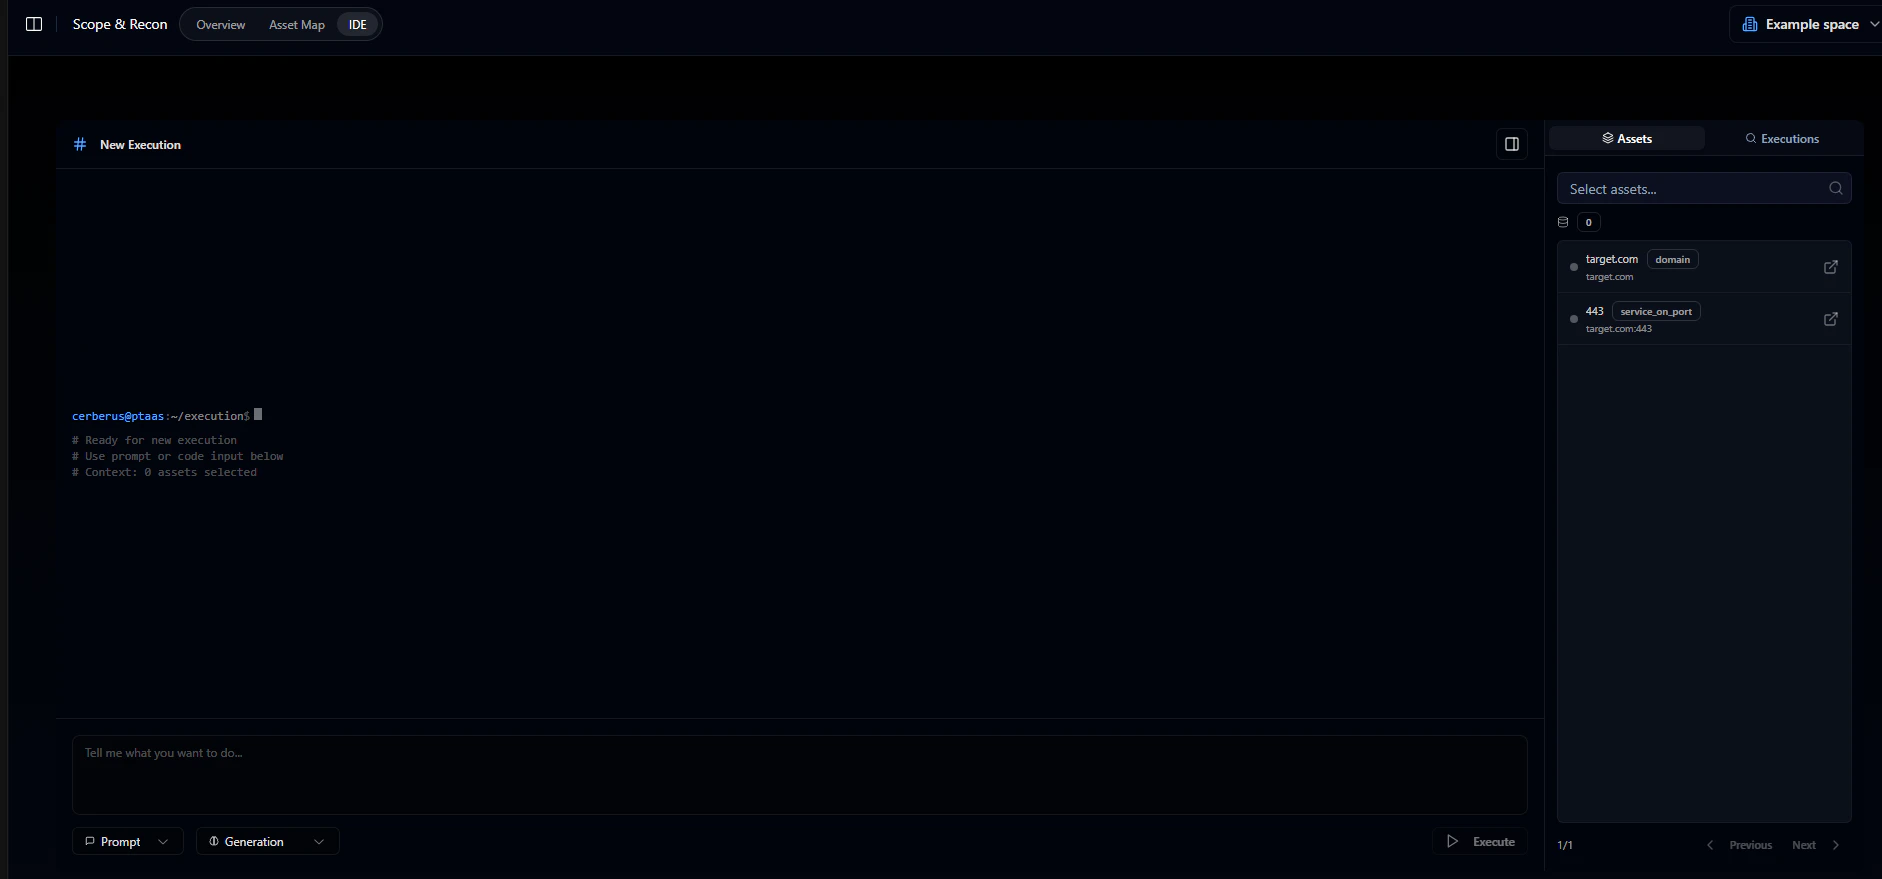
Go to the **IDE** tab within Scope & Reconnaissance. From here you can:
* Generate automated scanning scripts
* Run automated pentesting with AutoPT
* Get AI-suggested attack vectors
The right panel shows your available assets. Click on them to add them to your prompt.
### Step 3: Run your first prompt
Go to the **IDE** tab within Scope & Reconnaissance. From here you can:
* Generate automated scanning scripts
* Run automated pentesting with AutoPT
* Get AI-suggested attack vectors
The right panel shows your available assets. Click on them to add them to your prompt.
 The **Executions** tab shows all previous runs.
To create a new prompt:
1. Click **New Prompt**
2. Switch the selectors to **prompt** and **pentest** in the bottom left corner
3. Write your instruction - for example, ask AutoPT to test a web API for NoSQL injection
The **Executions** tab shows all previous runs.
To create a new prompt:
1. Click **New Prompt**
2. Switch the selectors to **prompt** and **pentest** in the bottom left corner
3. Write your instruction - for example, ask AutoPT to test a web API for NoSQL injection
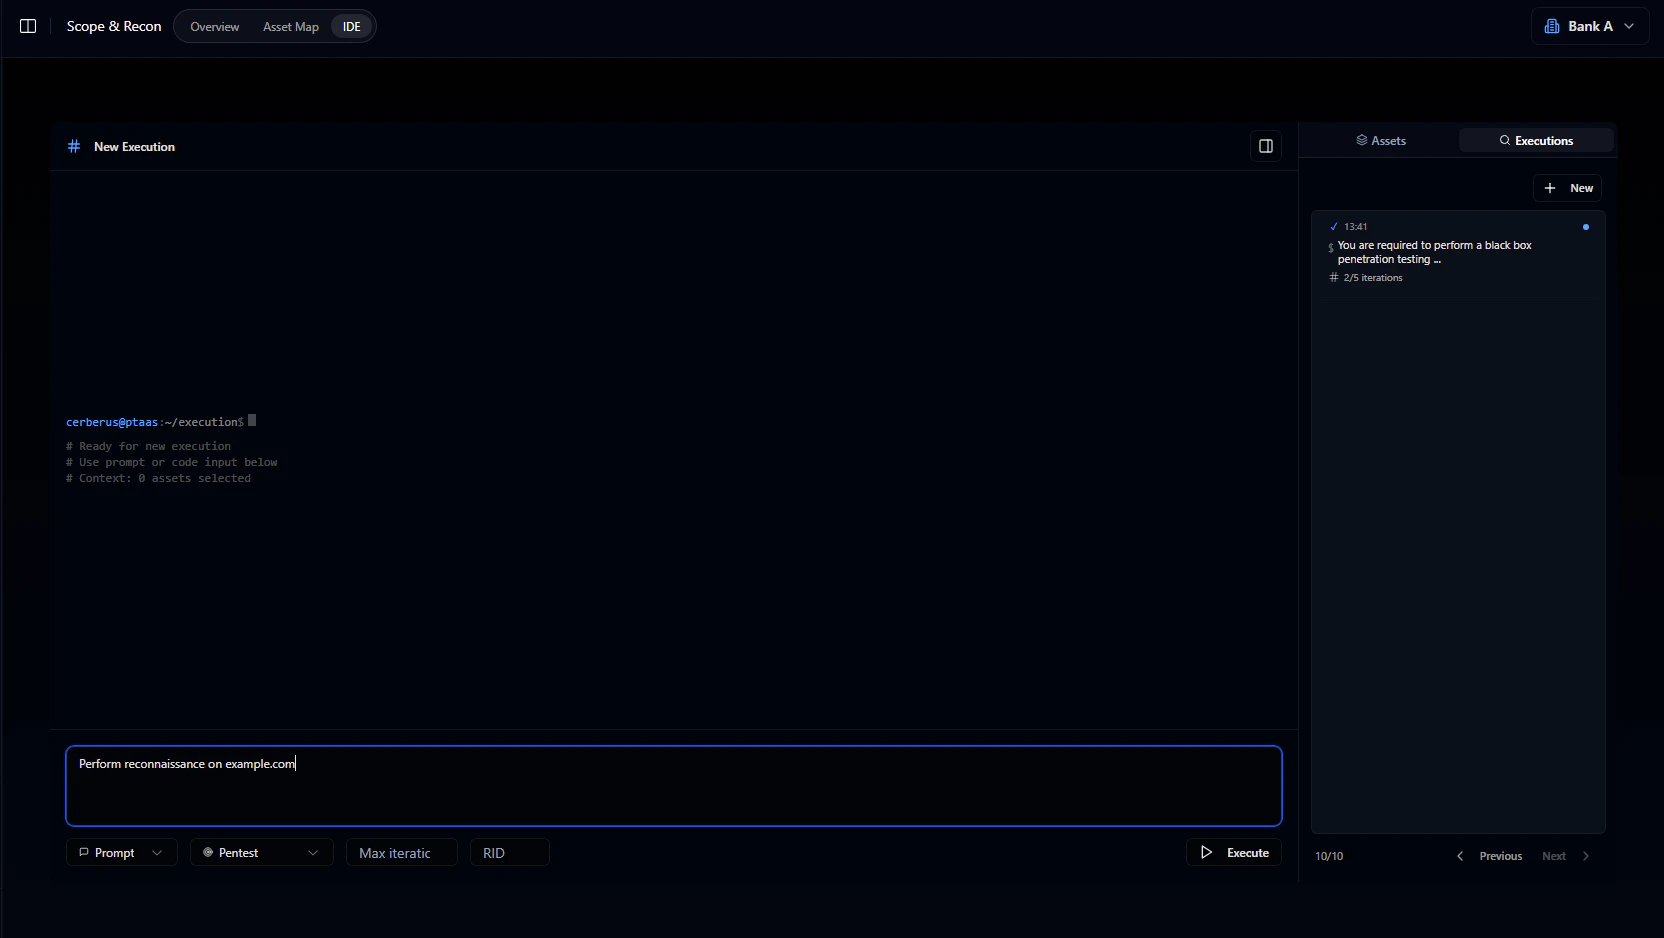 Two fields appear next to the selector:
* **Max iterations**: How many iterations AutoPT will run. Set this to around 50 for larger projects.
* **RID**: Runner ID - a unique identifier for the runner executing your code. Leave blank to auto-generate.
After clicking Execute, your prompt appears at the top. The session has started, but execution hasn't begun yet - you need to set up MCP-CCE (the Runner). See the MCP-CCE guide for details.
To get your runner token:
1. Click the key icon
Two fields appear next to the selector:
* **Max iterations**: How many iterations AutoPT will run. Set this to around 50 for larger projects.
* **RID**: Runner ID - a unique identifier for the runner executing your code. Leave blank to auto-generate.
After clicking Execute, your prompt appears at the top. The session has started, but execution hasn't begun yet - you need to set up MCP-CCE (the Runner). See the MCP-CCE guide for details.
To get your runner token:
1. Click the key icon
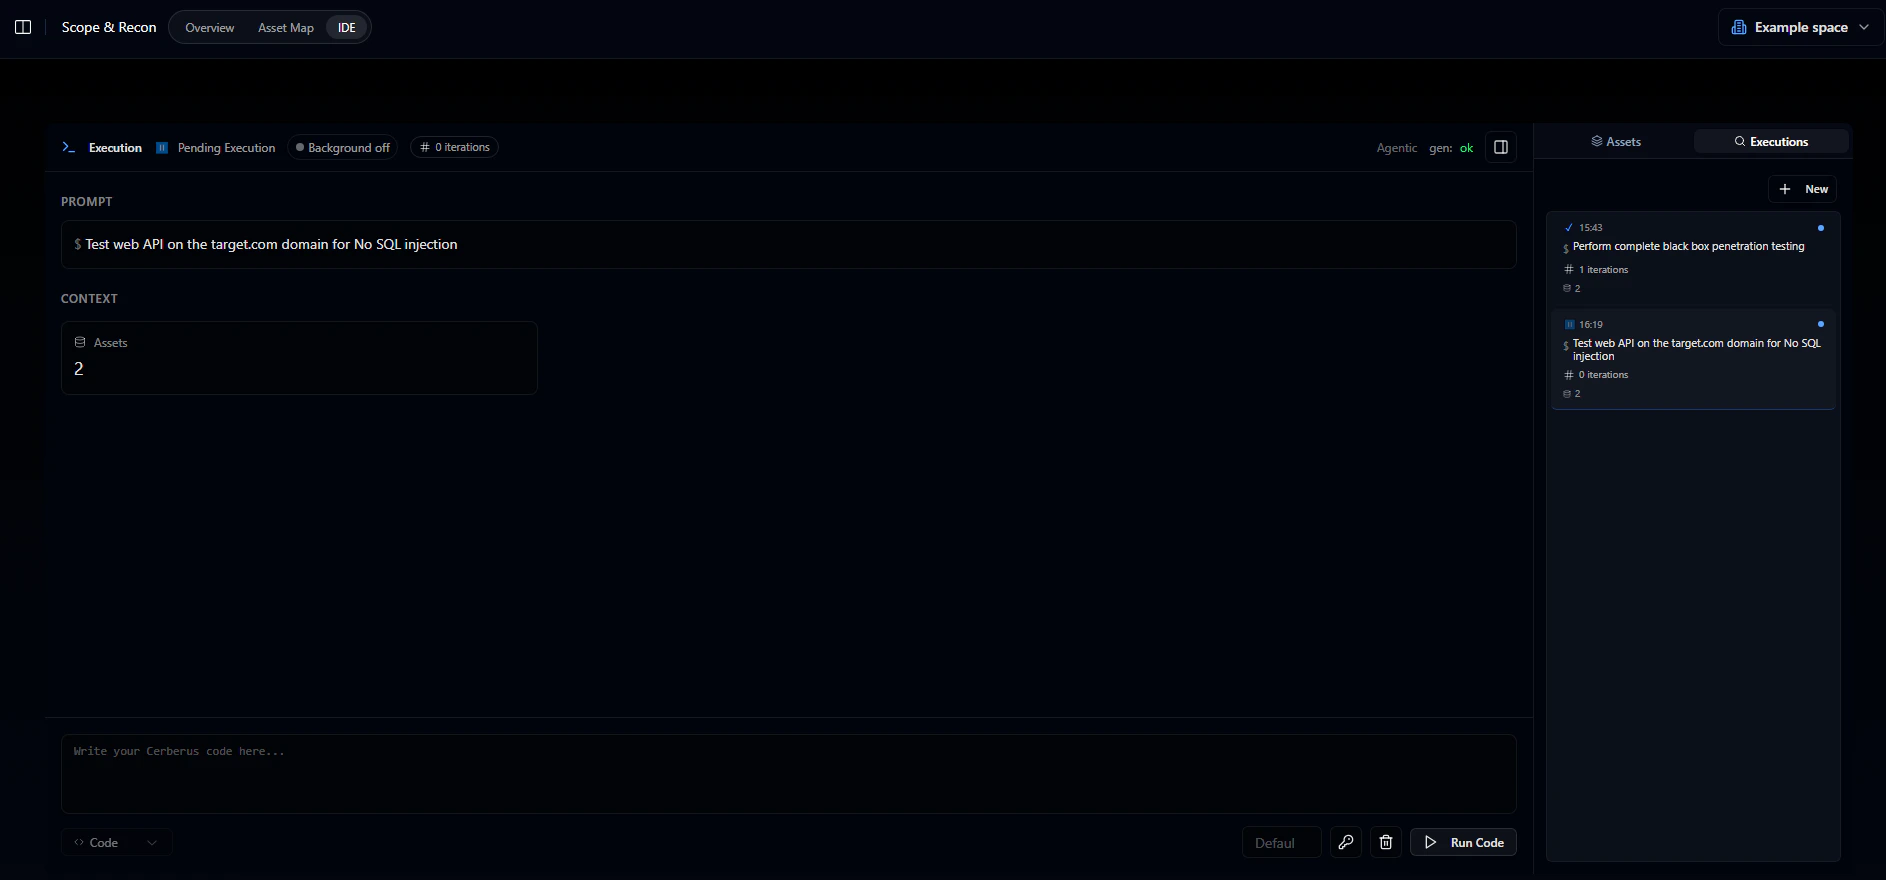 2. Click **Issue runner token**
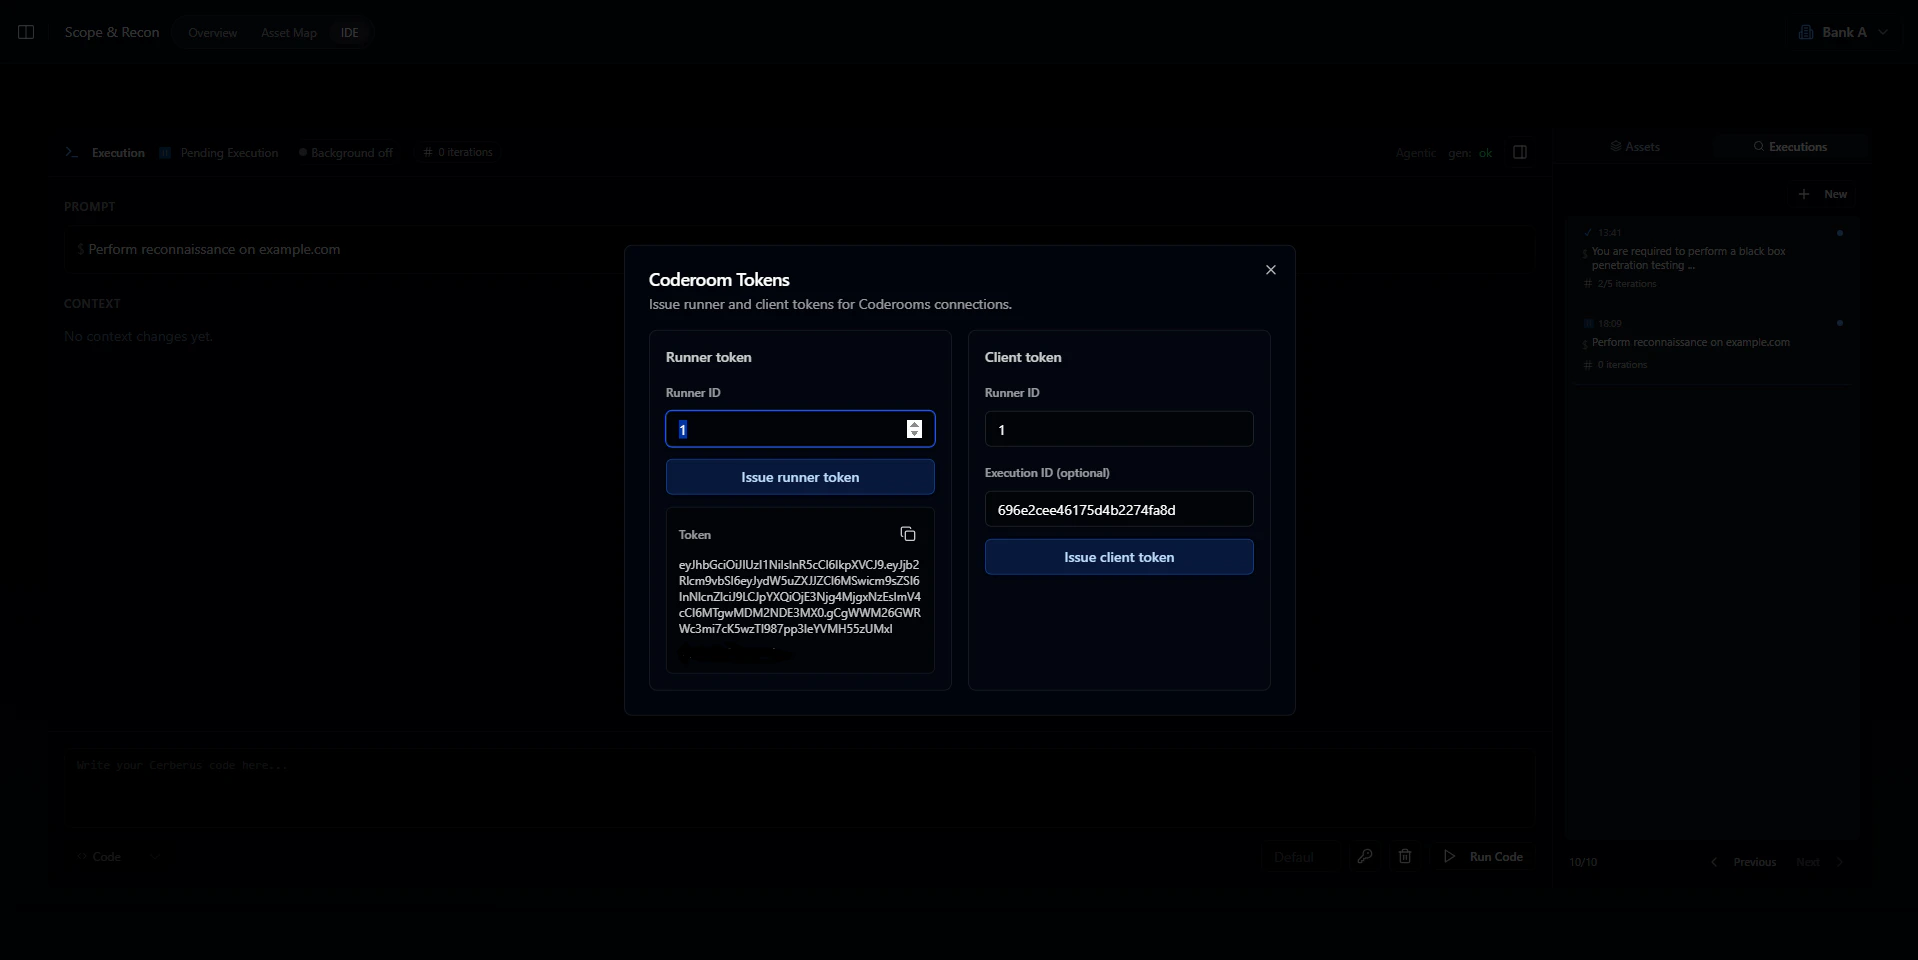 Use that token to start the runner, then click **Run** to begin the AutoPT execution.
During execution, you can watch the progress and AutoPT's thinking process in the IDE.
Use that token to start the runner, then click **Run** to begin the AutoPT execution.
During execution, you can watch the progress and AutoPT's thinking process in the IDE.
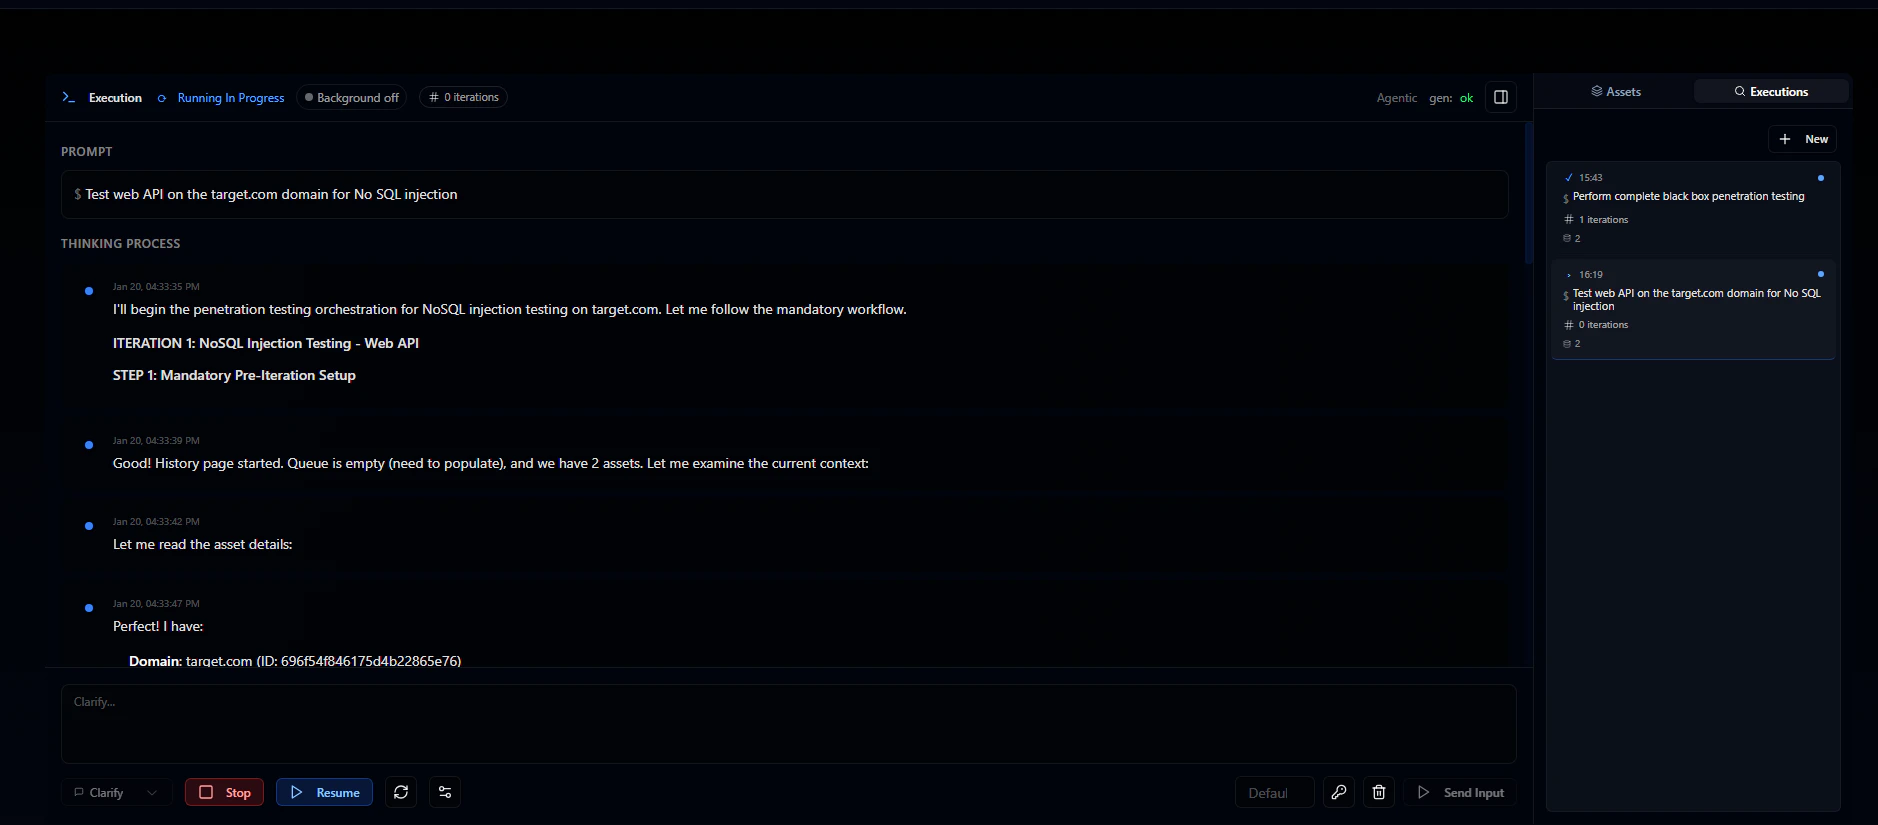 You'll see buttons to stop or continue the execution. The text field lets you send additional instructions to AutoPT mid-run.
The circular arrows icon retrieves context from AutoPT. Click it, then click **Retrieve context** to pull updates.
You'll see buttons to stop or continue the execution. The text field lets you send additional instructions to AutoPT mid-run.
The circular arrows icon retrieves context from AutoPT. Click it, then click **Retrieve context** to pull updates.
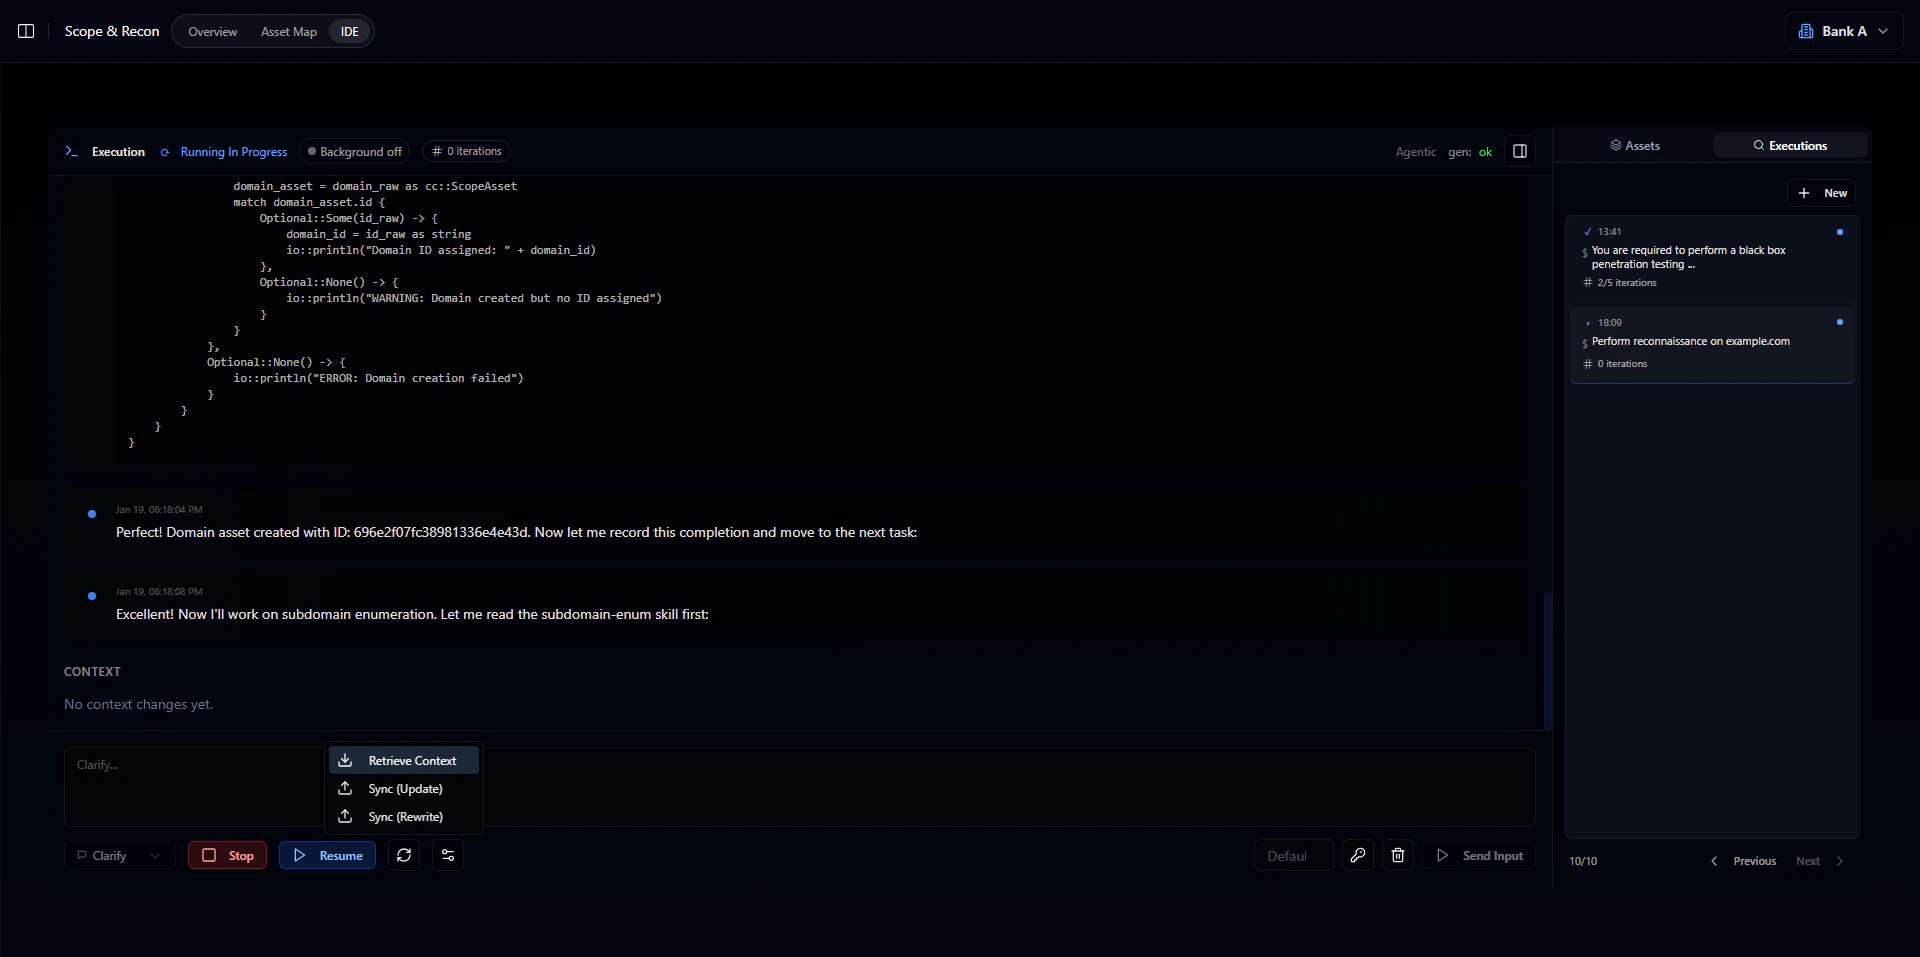 From there you can apply or revert changes.
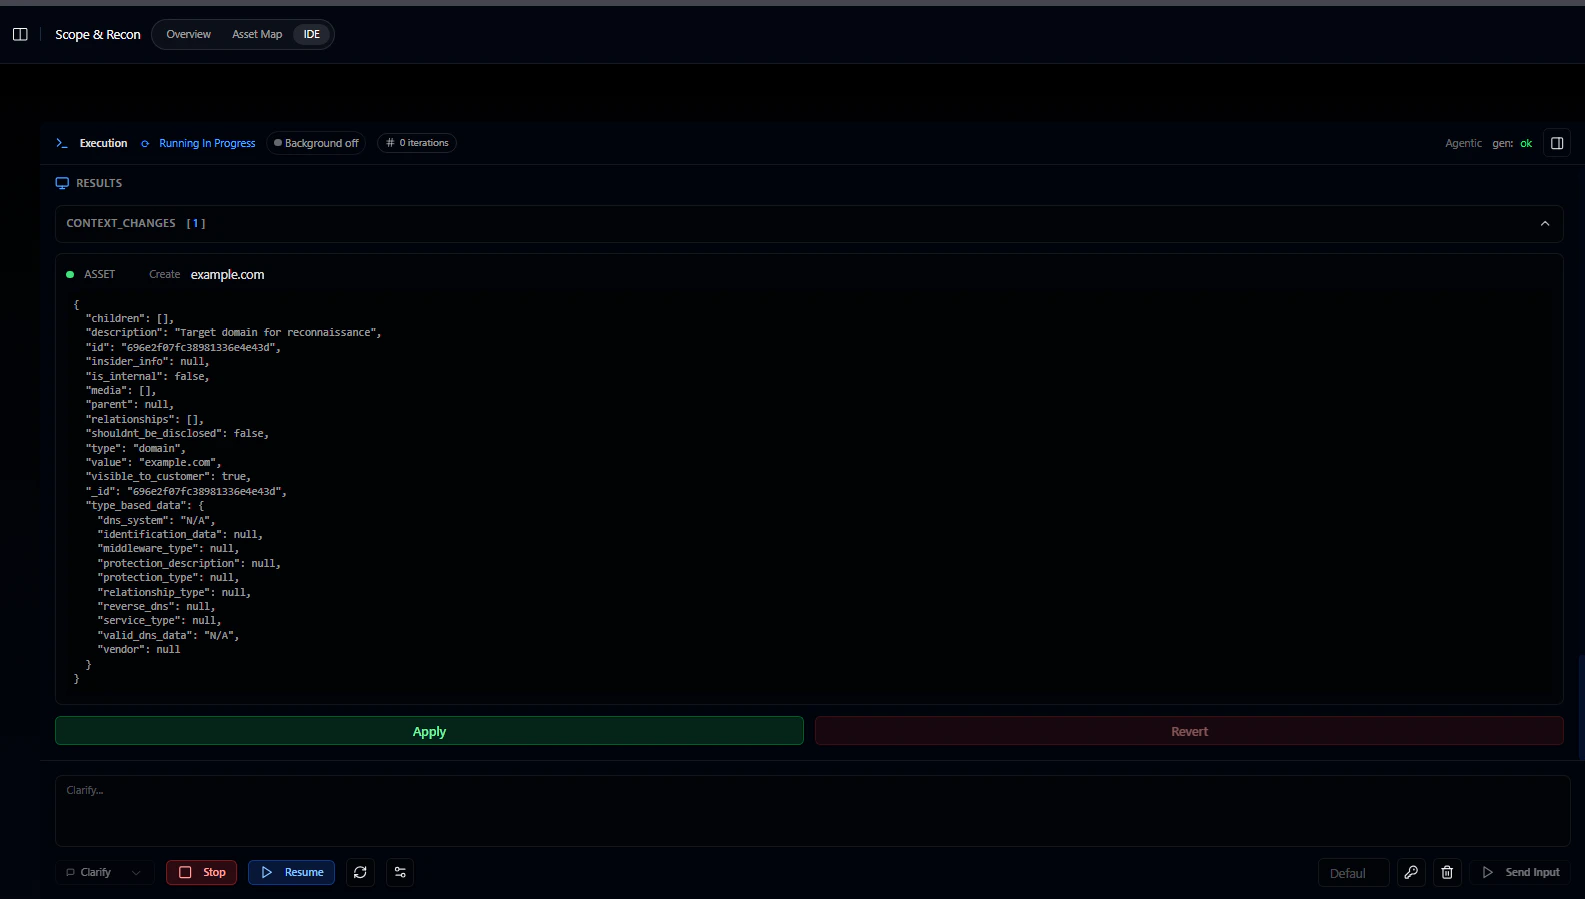 The settings icon (next to the circular arrows) controls background execution options:
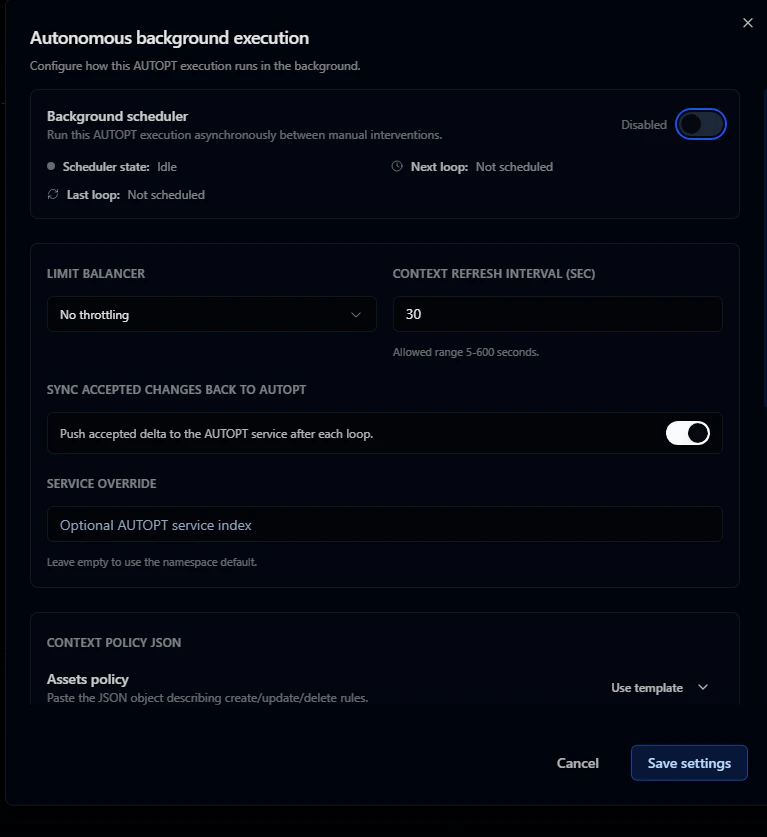 You can configure:
* Time intervals between iterations (to avoid rate limits or system overload)
* Scheduling (business hours only, specific days of the week)
* Maximum iteration count
* Whether to auto-apply context changes
### Step 4: Review results
As testing runs, apply context changes periodically to sync your results. This updates the asset map and populates the vulnerability and defended attacks lists.
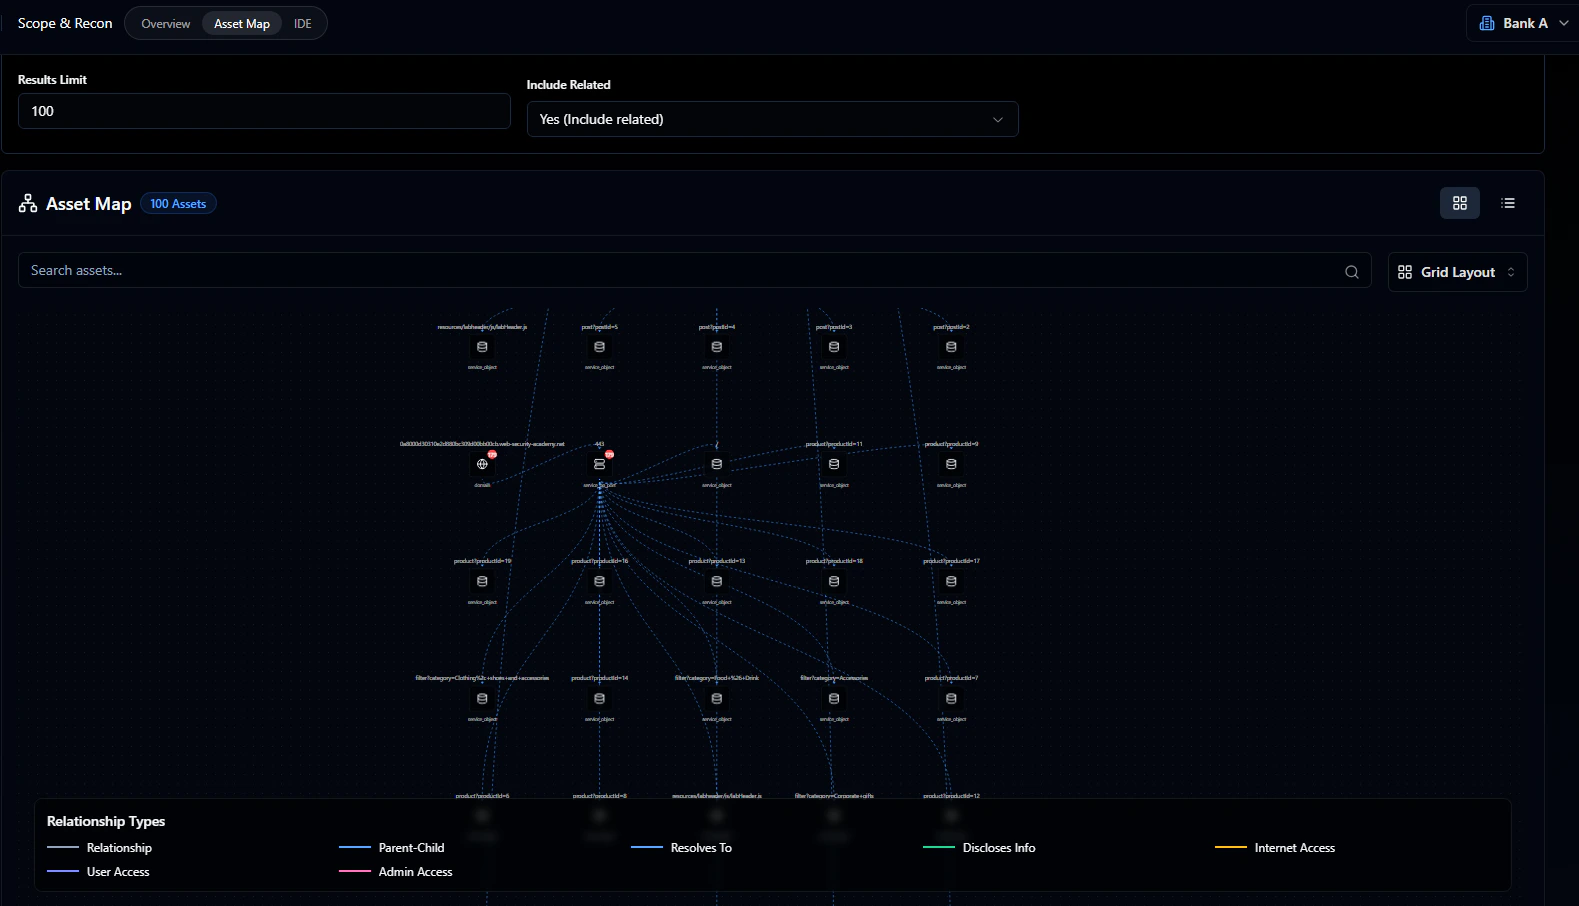
Findings appear in the **Asset map** section:
You can configure:
* Time intervals between iterations (to avoid rate limits or system overload)
* Scheduling (business hours only, specific days of the week)
* Maximum iteration count
* Whether to auto-apply context changes
### Step 4: Review results
As testing runs, apply context changes periodically to sync your results. This updates the asset map and populates the vulnerability and defended attacks lists.
Findings appear in the **Asset map** section:
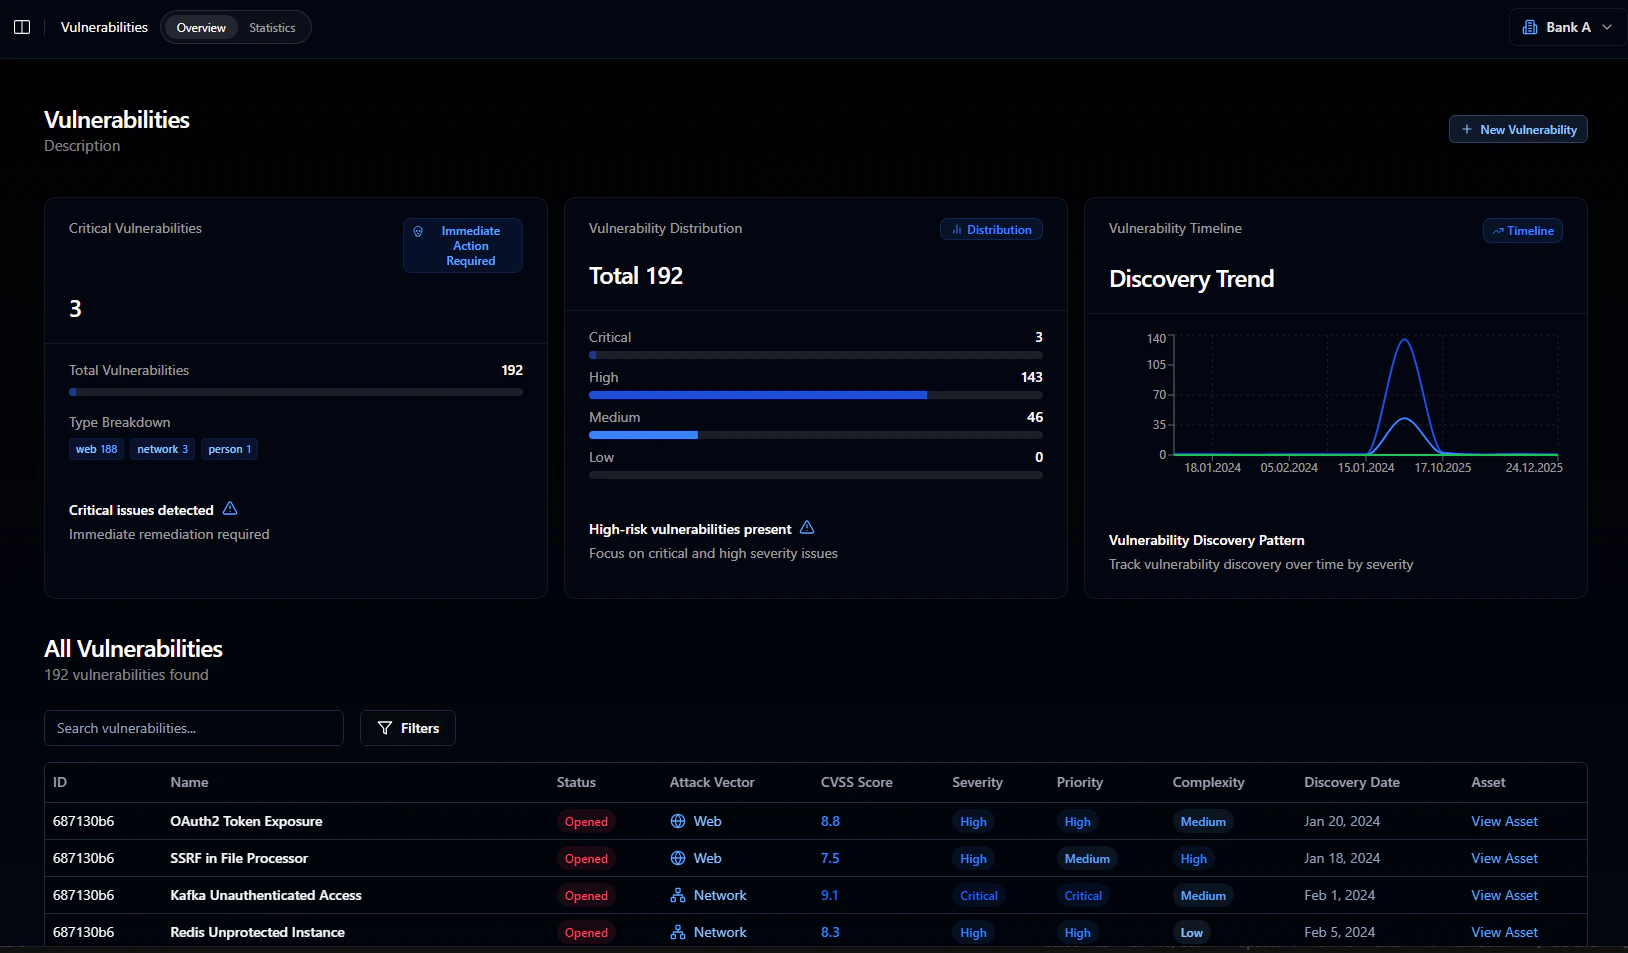
 For a full vulnerability list, check the **Vulnerabilities** tab:
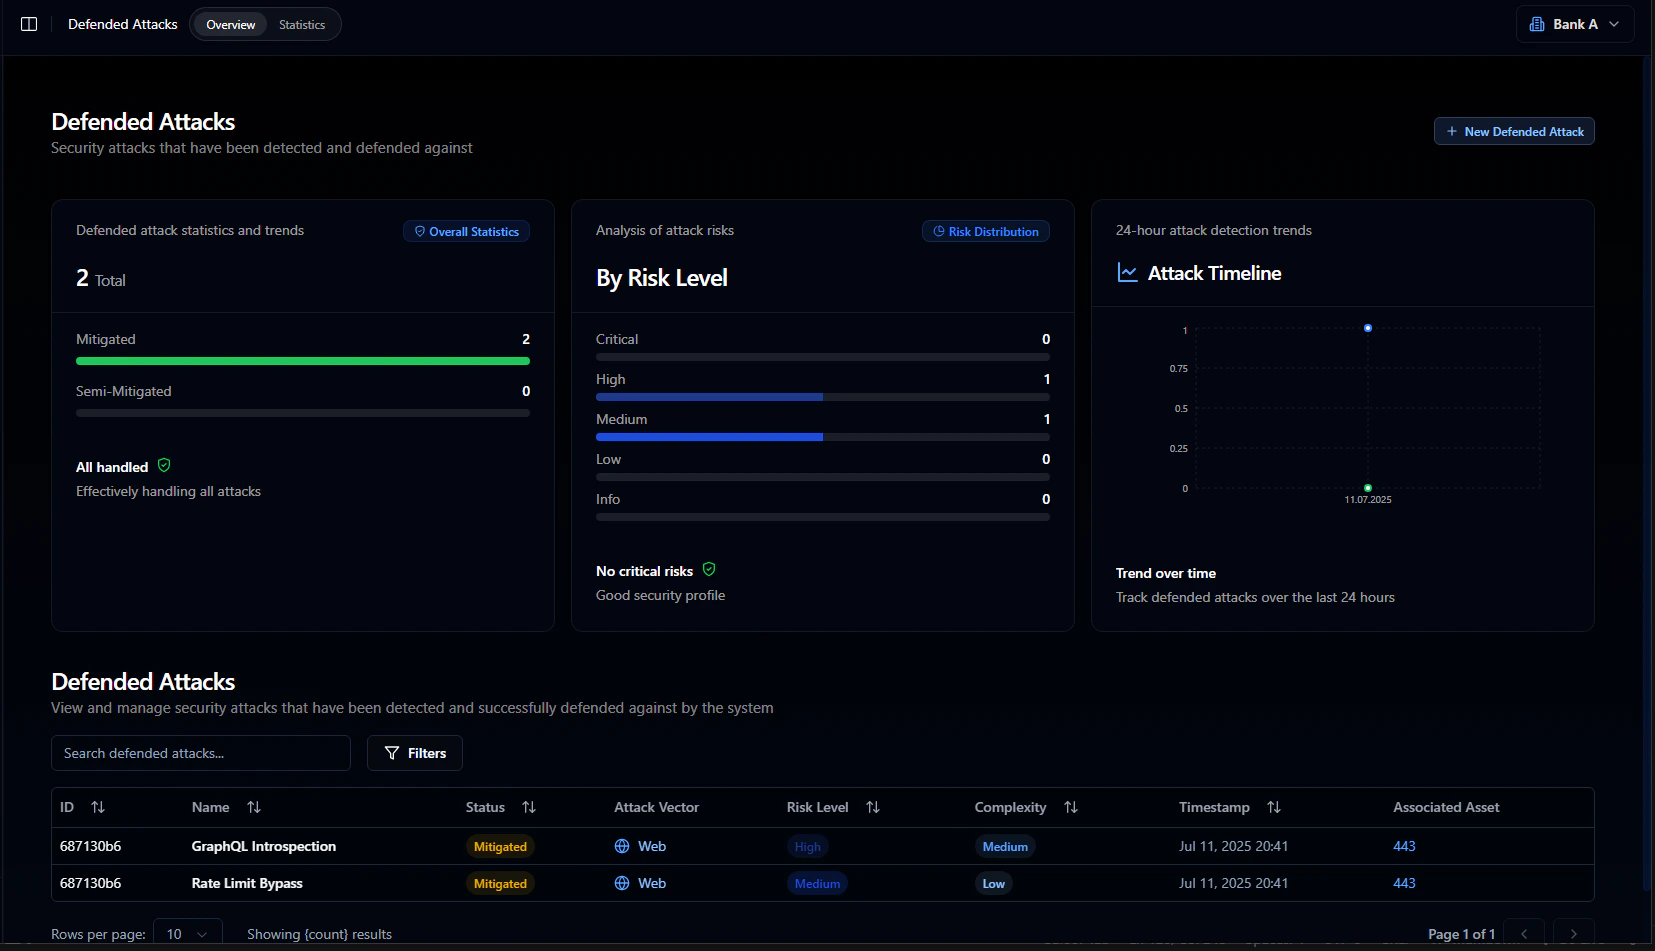
 Tests that didn't find vulnerabilities are logged in the **Defended attacks** tab. For example, if AutoPT tested for GraphQL introspection but the server blocked it, that gets logged here.